 Save
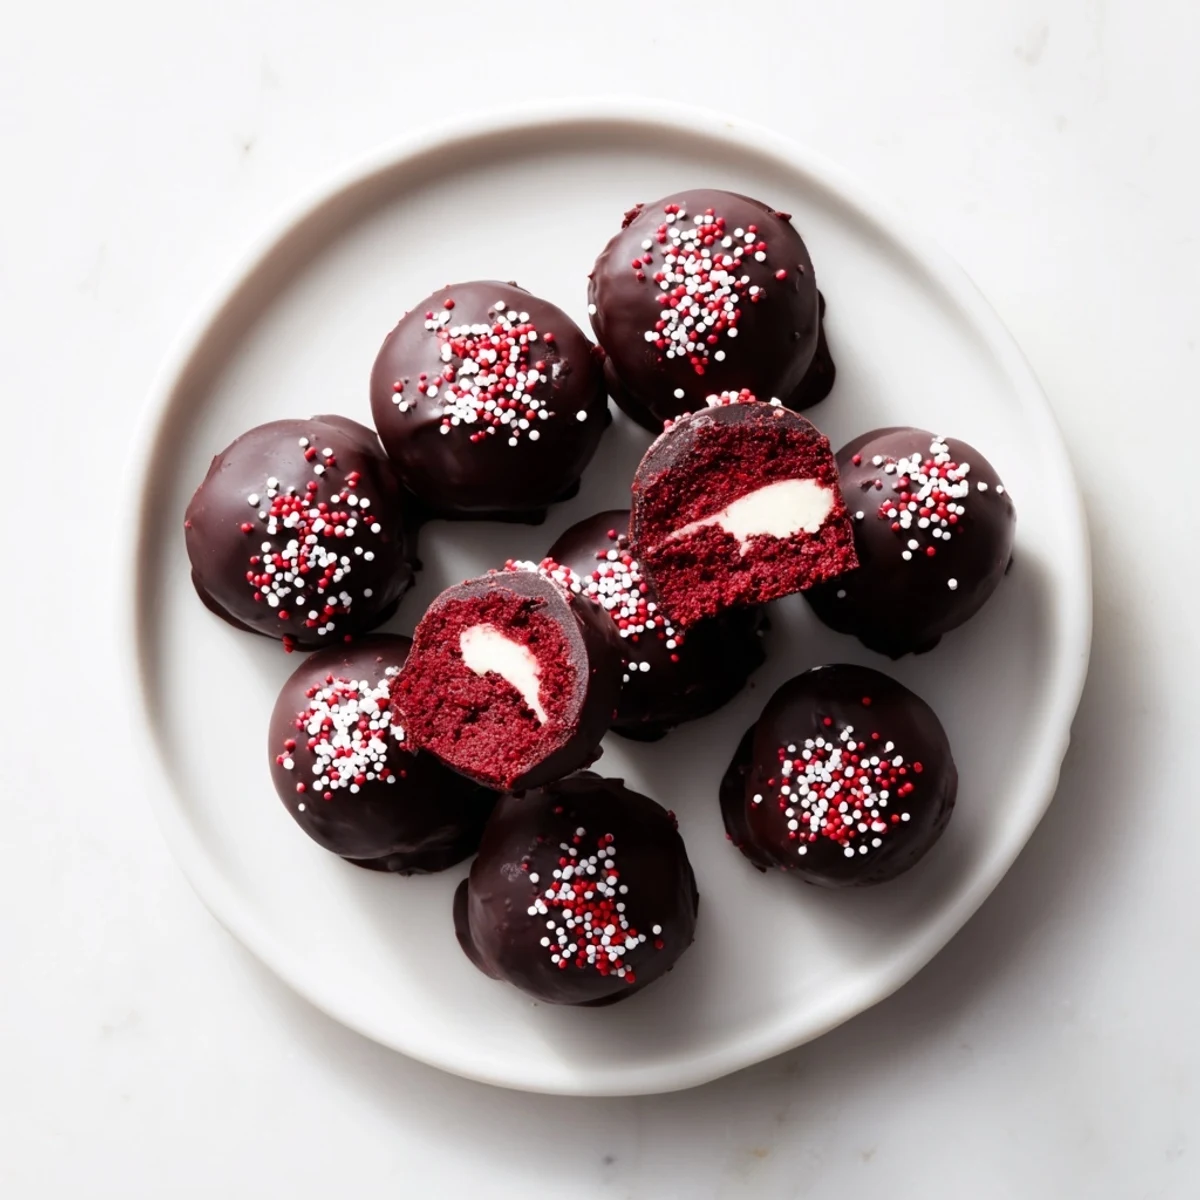
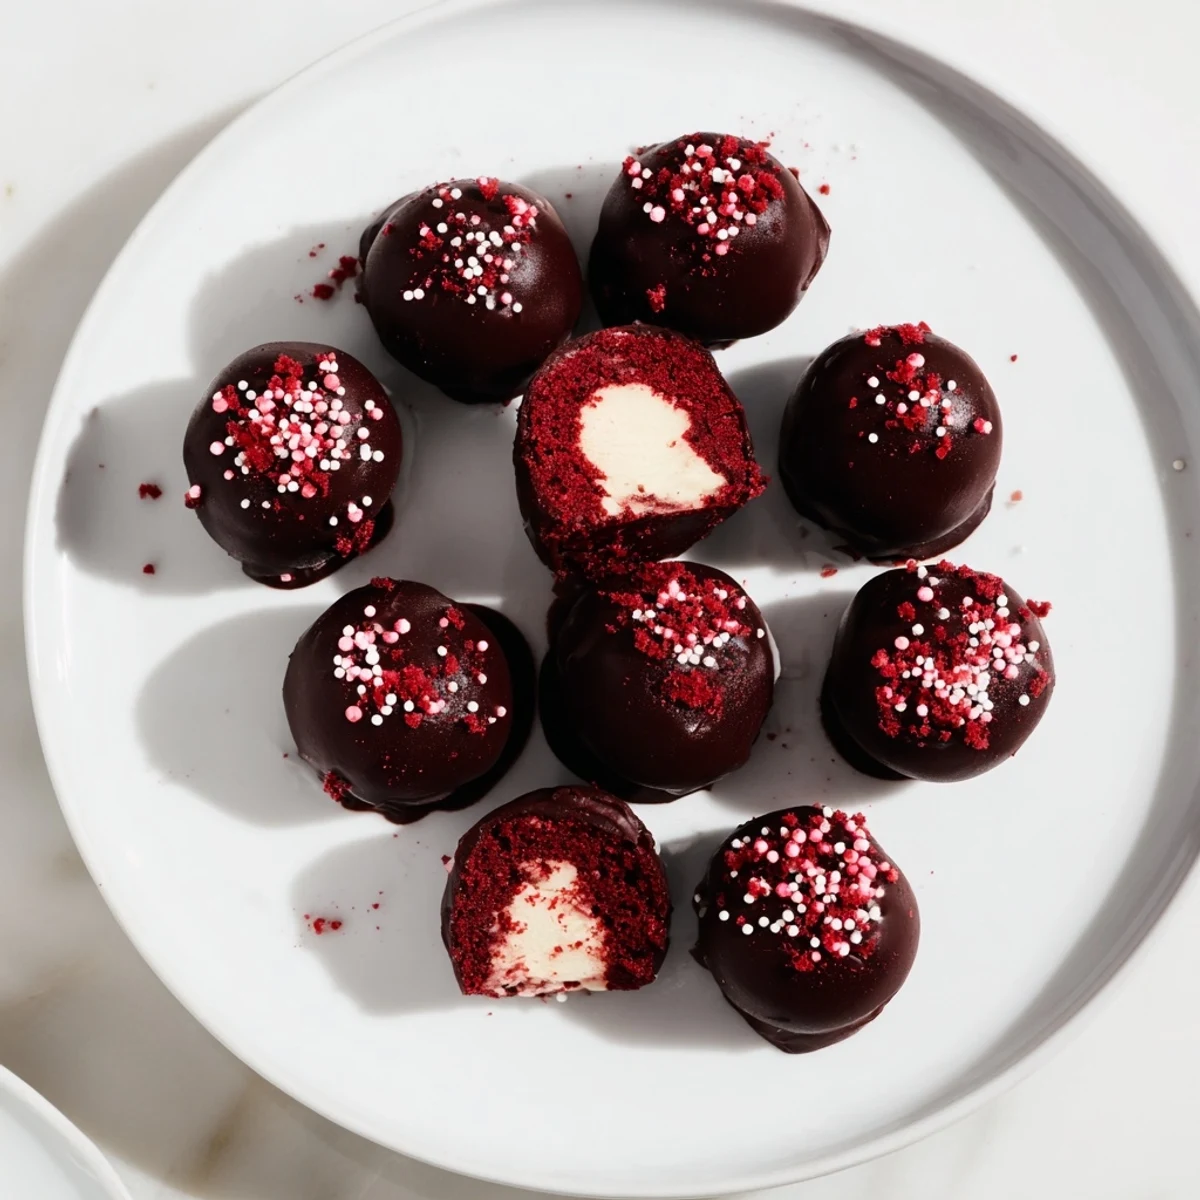
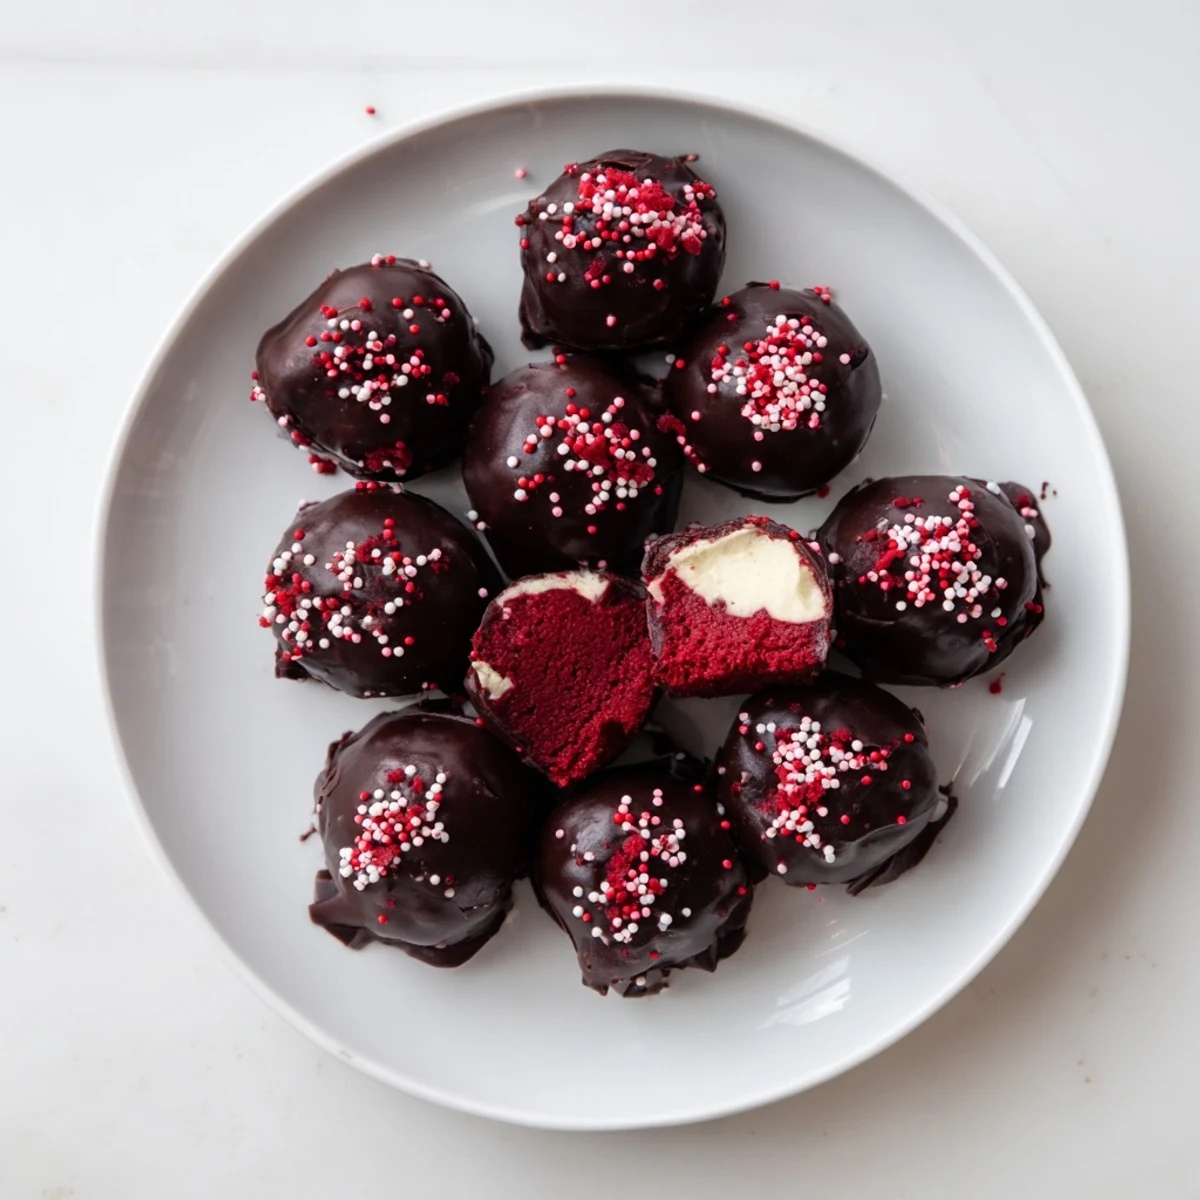
Save These indulgent red velvet cheesecake balls combine the best of both worlds—moist, chocolate-infused red velvet cake blended with a smooth, creamy cheesecake center. Each bite-sized sphere gets dipped in melted chocolate for a satisfying crunch that gives way to a rich, velvety interior.
The process starts with baking a classic red velvet cake from scratch, then crumbling it once cooled. The cake crumbs mix with a sweetened cream cheese mixture to form a dough-like consistency that's easy to roll into uniform balls. After a quick chill in the freezer to firm them up, each ball takes a dip in melted chocolate—white or dark works beautifully depending on your preference.
These decadent treats are perfect for parties, holiday gatherings, or whenever you need an impressive yet manageable dessert. They come together in under two hours and can be made ahead of time, storing beautifully in the refrigerator or freezer. The contrast between the crisp chocolate shell and the soft, creamy interior makes them utterly irresistible.
My kitchen counters were dusted red for three days after my first attempt at these little beauties, and honestly, it was worth every sponge scrubbing session. I brought them to a friends potluck expecting polite nibbles and walked home with an empty tray and seven text messages begging for the recipe. Something about the combination of tangy cheesecake and cocoa laced red velvet tucked inside a crisp chocolate shell makes people lose all restraint.
My neighbor Sandra once stood in my driveway in January eating three of these straight from the container I was carrying to my car. She claimed they were too cold to resist, which made no sense at all, but I forgave her because watching someone enjoy something you made that much is genuinely the best feeling.
Ingredients
- All purpose flour (1 1/4 cups, 160 g): Provides structure to the red velvet crumb, and sifting it once makes the cake lighter and easier to crumble later.
- Granulated sugar (3/4 cup, 150 g): Balances the cocoa and tang from the buttermilk, keeping the cake tender without making it overly sweet once the coating is added.
- Unsweetened cocoa powder (2 tbsp, 16 g): Just enough to give that signature red velvet flavor without turning the cake brown.
- Baking soda and salt (1/2 tsp and 1/4 tsp): The leavening gives a slight rise while salt sharpens every flavor in the background.
- Buttermilk, room temperature (1/2 cup, 120 ml): The secret to a moist, tender crumb and a gentle tang that pairs beautifully with the cheesecake center.
- Unsalted butter, softened (1/2 cup, 110 g): Creates richness in the cake layer, and using unsalted lets you control the overall saltiness.
- Large eggs, room temperature (2): Bind everything together and add structure, so let them sit out for twenty minutes before mixing.
- Vanilla extract (1 tsp for cake, 1/2 tsp for filling): A good quality vanilla makes a quiet but noticeable difference in a recipe with so few ingredients.
- Red food coloring (1 tbsp): Gel coloring gives the most vibrant result without thinning the batter like liquid versions can.
- Cream cheese, softened (8 oz, 225 g): The soul of the filling, so make sure it is truly soft or you will fight lumps the entire time.
- Powdered sugar (1/4 cup, 30 g): Sweetens the cheesecake layer gently without making it grainy.
- White or dark chocolate, chopped or melting wafers (10 oz, 285 g): Melting wafers are foolproof, but good quality chopped chocolate tastes richer and sets with a satisfying snap.
- Red or white sprinkles (optional): A simple finishing touch that makes each ball feel finished and festive.
Instructions
- Bake the Red Velvet Cake:
- Preheat your oven to 350 degrees Fahrenheit and grease an 8 by 8 inch pan with parchment. Whisk the dry ingredients together in one bowl and the wet ingredients including that glorious splash of red coloring in another, then fold them together gently until just combined. Pour the batter in and bake for 18 to 20 minutes until a toothpick slides out clean, then let it cool completely because patience here saves you from a crumbly mess later.
- Whip Up the Cheesecake Filling:
- Beat the softened cream cheese with powdered sugar and vanilla until the mixture is silky smooth with no stubborn lumps hiding in the corners. If your kitchen is warm and the filling feels too soft to hold its shape, pop it in the fridge for 15 minutes to firm up.
- Form the Balls:
- Crumble the cooled cake into a large bowl using your fingers until no large chunks remain, then add the cheesecake mixture and work it through with your hands until it forms a cohesive dough. Roll tablespoon sized portions into smooth balls and arrange them on a parchment lined sheet, then freeze for one full hour so they hold their shape during dipping.
- Dip and Coat:
- Melt the chocolate in a microwave safe bowl in short 20 second bursts, stirring between each round until the chocolate is glossy and fluid. Drop a frozen ball in, roll it gently with a fork to coat every side, lift it out letting excess drip off, and place it back on the parchment. Add sprinkles immediately while the chocolate is still wet because it sets faster than you expect.
- Let Them Set:
- Leave the coated balls at room temperature or slide the tray into the fridge until the chocolate hardens into a clean shell. Serve them chilled or let them sit out for ten minutes before eating so the cheesecake center softens slightly.
 Save
Save The moment these go from a messy pile of crumbs and cream cheese to these perfectly round, glossy little truffles feels like pure kitchen magic every single time.
A Note on Chocolate Choices
White chocolate gives a striking contrast against the red interior and looks stunning on a dessert table, while dark chocolate adds a bitter edge that balances the sweetness beautifully. I have tried ruby chocolate once on a whim and the pink exterior with the red velvet center was almost too pretty to eat, almost being the key word.
Storing and Sharing
These keep wonderfully in an airtight container in the fridge for up to a week, though in my experience they rarely survive past day three. For longer storage, freeze them in a single layer before transferring to a bag and they will hold their texture for a full month.
What to Watch Out For
The crumb texture is everything when forming the balls, so here are a few things that saved my later batches after some early disasters.
- If the mixture feels too dry to roll, add a tiny splash of milk or extra cream cheese a teaspoon at a time.
- Chilled dough rolls more cleanly, so if your hands are warm, rinse them under cold water first.
- Always dip one test ball before committing the whole batch to check your chocolate consistency.
 Save
Save Whether you make these for a holiday tray or a quiet weekend treat, they have a way of making any ordinary moment feel a little more celebratory.
Questions & Answers
- → How long do red velvet cheesecake balls stay fresh?
-
Store these treats in an airtight container in the refrigerator for up to one week. For longer storage, freeze them for up to one month. Thaw frozen balls in the refrigerator before serving for best texture and flavor.
- → Can I use boxed red velvet cake mix instead of making it from scratch?
-
Absolutely! Using a boxed cake mix works perfectly and saves time. Prepare the cake according to package instructions, then proceed with crumbling and combining with the cheesecake mixture as directed in the recipe.
- → What's the best way to melt chocolate for coating?
-
Melt chocolate in a microwave-safe bowl in 20-second intervals, stirring between each session. This prevents burning and ensures smooth, even melting. Alternatively, use a double boiler on the stovetop for gentle, consistent heat.
- → Why do my cheesecake balls fall apart when dipping?
-
If the mixture is too warm or soft, the balls won't hold their shape. Ensure the dough is well-chilled—freeze for at least one hour before dipping. If the mixture feels too soft initially, refrigerate it for 15-30 minutes before rolling into balls.
- → Can I add liqueur to these red velvet cheesecake balls?
-
Yes! Adding a splash of Bailey's Irish Cream, Chambord, or your favorite liqueur to the cheesecake mixture creates a sophisticated adult variation. Start with 1-2 tablespoons and adjust to taste—the alcohol flavor mellows slightly once chilled.
- → What chocolate coating works best?
-
Both white and dark chocolate create delicious results. White chocolate complements the vanilla notes in the cheesecake, while dark chocolate provides a rich contrast to the sweet red velvet. Chocolate melting wafers tend to create the smoothest coating.
