 Save
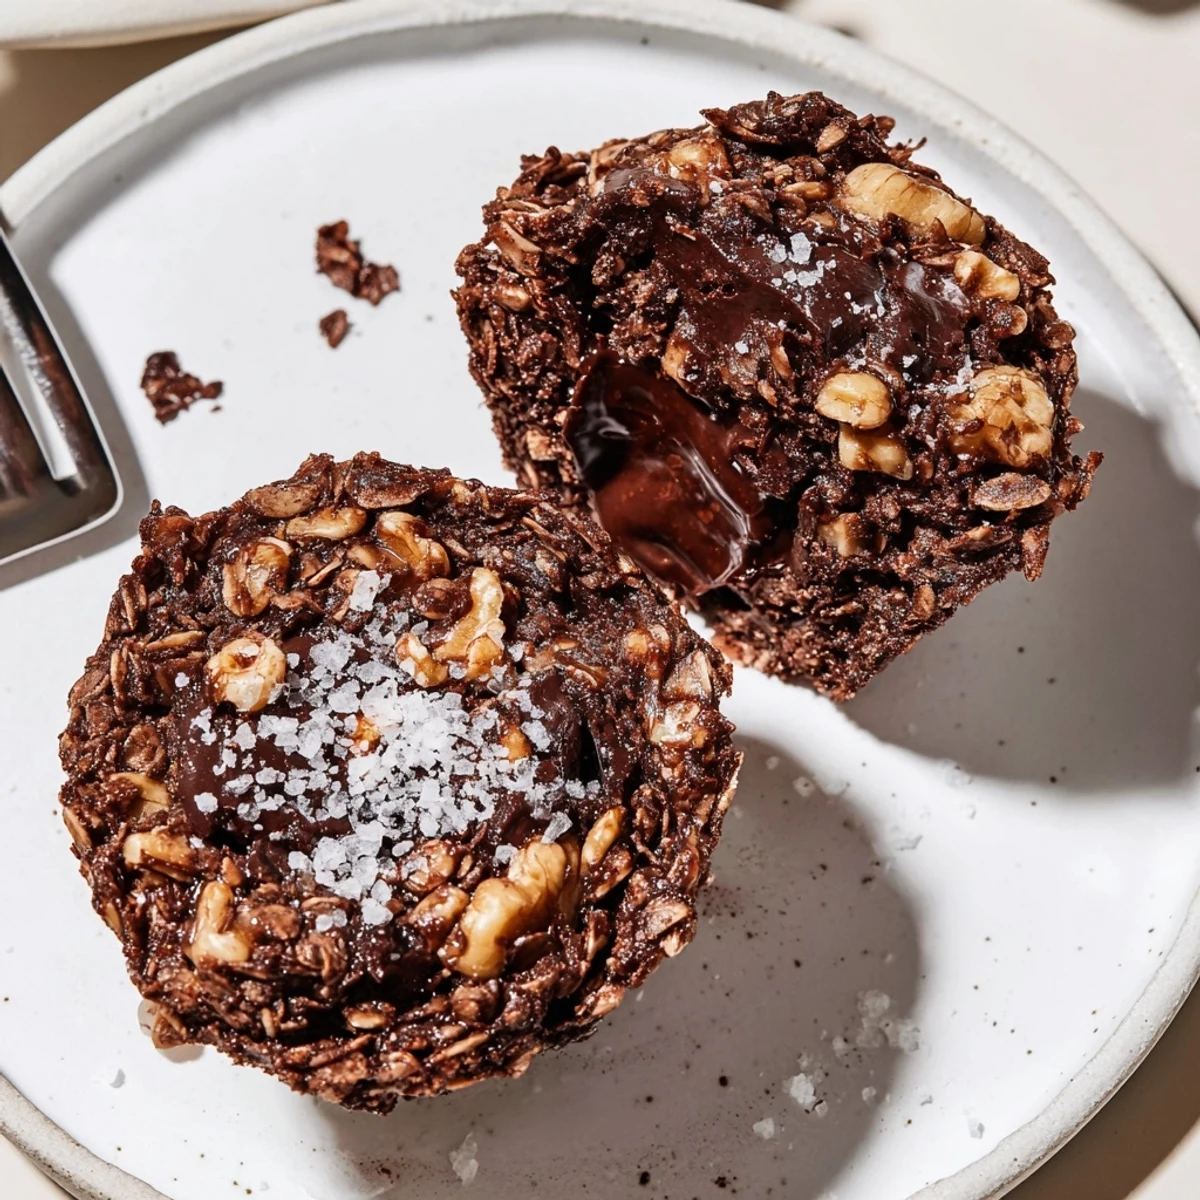
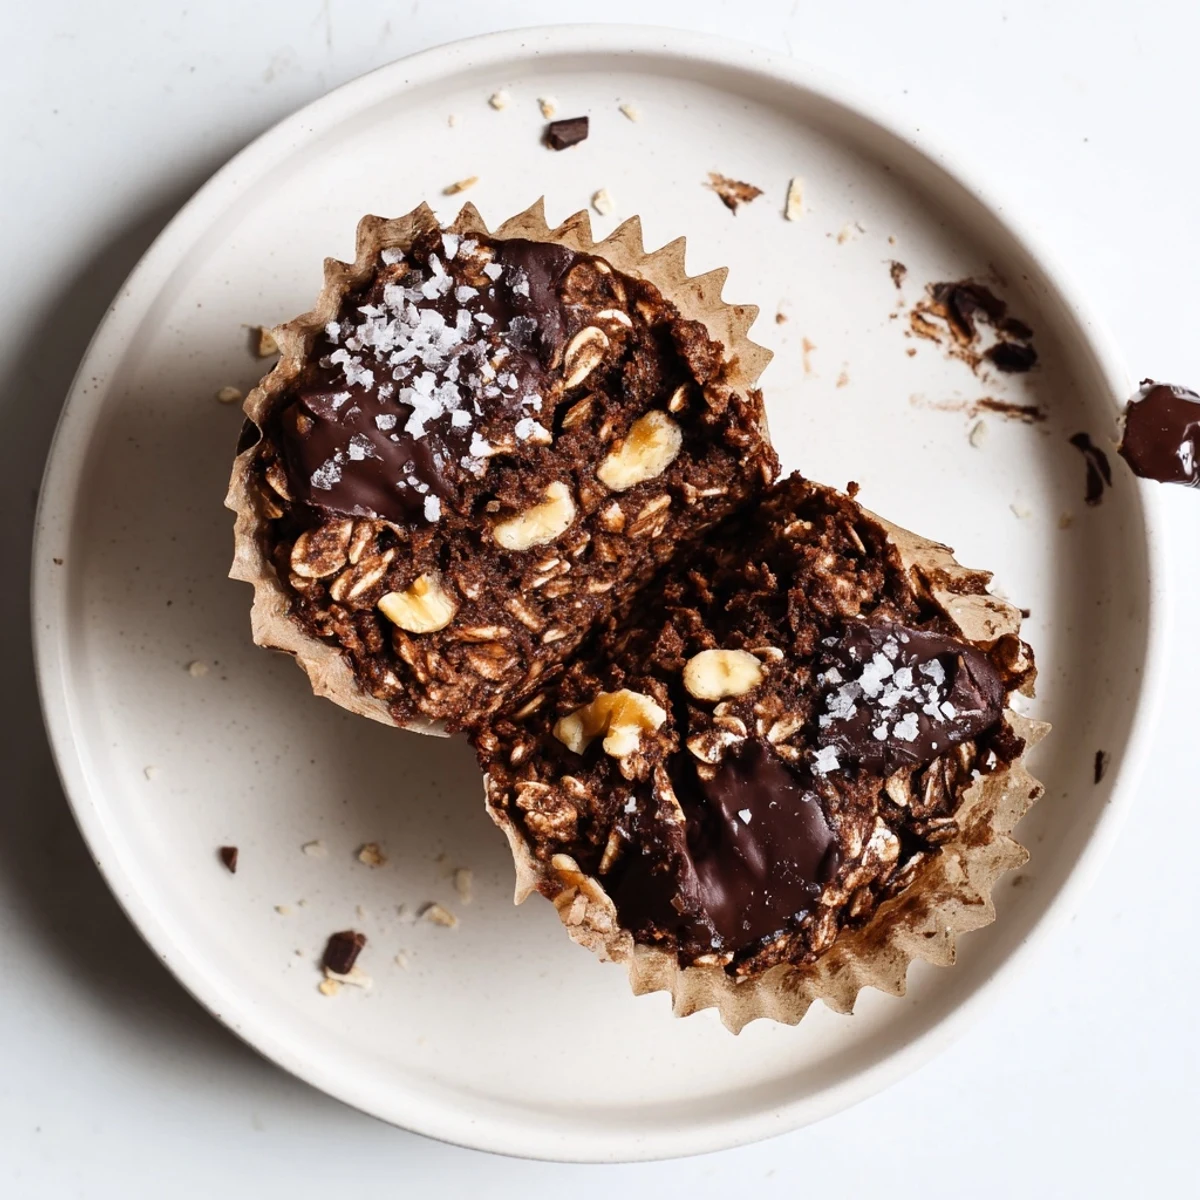
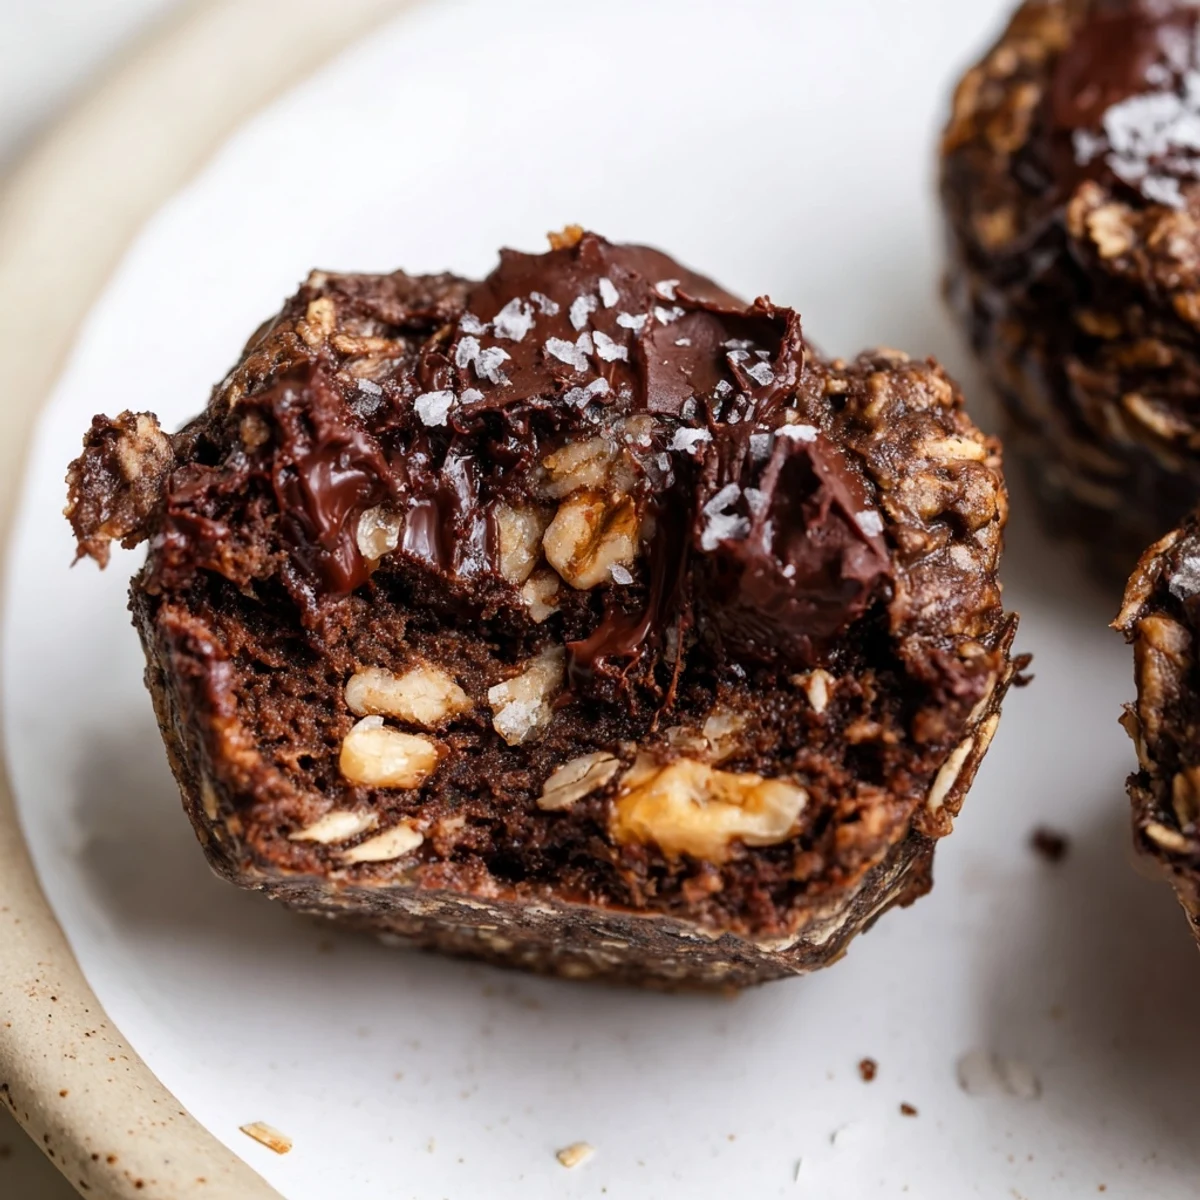
Save These moist, fudgy dark chocolate oatmeal cups come together in about 35 minutes. Combine oats, almond flour, cocoa, salt, and baking powder; whisk melted coconut oil, maple syrup, brown sugar, eggs, and vanilla; fold in dark chocolate and nuts. Bake until centers set, cool briefly in the pan, then transfer to a rack. Swap flax eggs and dairy-free chocolate for a vegan version and sprinkle flaky sea salt before baking for extra contrast.
Last week, rain drummed steadily against the window as I measured out cocoa powder for these dark chocolate oatmeal cups. Sometimes chocolate cravings hit at the oddest hours, and these were born from one such late-night inspiration. The scent of melting coconut oil mingling with vanilla was enough to lure my roommate from her room just to ask what magic was happening in the kitchen. There is something deeply satisfying about scooping a decadent yet wholesome batter into muffin pans when the world outside is all gray and dripping.
I made these for a picnic last fall, and I still remember the surprised smiles when friends realized how fudgy and rich they were. Even the ones who swore they didn’t like oats ended up pocketing a second cup for later. On chilly mornings, I’ve passed them over the back fence to my neighbor, earning a thumbs-up and a muffled ‘thank you’ through a mouthful of chocolate. Their portability means they’ve quietly accompanied me everywhere from hikes to road trips, always disappearing fast.
Ingredients
- Old-fashioned rolled oats: These form the hearty base; I learned not to substitute with quick oats or you lose that lovely chewy bite.
- Almond flour (or all-purpose flour): Almond flour adds moisture and a subtle nutty flavor, but I sometimes swap in regular flour when I’m out and no one’s the wiser.
- Unsweetened cocoa powder: Use the best you can find – it makes all the difference in chocolate depth.
- Sea salt: Just a pinch balances the sweetness and lets the chocolate shine through.
- Baking powder: Gives each cup the perfect gentle lift; forgetting it results in flat, dense snacks.
- Coconut oil, melted (or unsalted butter): Coconut oil gives a hint of tropical aroma, but butter makes it extra rich; both work beautifully.
- Pure maple syrup (or honey): Maple syrup delivers natural caramel notes – I once tried honey and it was just as delicious.
- Brown sugar, packed: Adds chew and a bit of molasses complexity; I always press it firmly into the cup for accuracy.
- Large eggs: Eggs are crucial for holding everything together; room temperature eggs blend in smoother.
- Vanilla extract: One teaspoon seems like so little, but it genuinely rounds out the entire flavor profile.
- Dark chocolate chips or chopped dark chocolate (at least 70% cocoa): The bitter-sweet pockets are the highlight – go for chunks for a gooier bite.
- Chopped walnuts or pecans (optional): Nuts bring surprise crunch – toasting them first unlocks even more flavor.
Instructions
- Prepare Your Pan:
- Set your oven to 350°F and get a muffin tin ready with paper liners or a sweep of nonstick spray. It makes cleanup shockingly easy, and the aroma will make the whole place feel cozy.
- Mix Dry Ingredients:
- In your largest bowl, tumble in oats, almond flour, cocoa powder, sea salt, and baking powder. I always run my hands through the oats (wash first!) to break any stray clumps.
- Blend the Wet:
- In a separate medium bowl, whisk together the melted coconut oil, maple syrup, brown sugar, eggs, and vanilla. The mixture should be glossy and aromatic before you move on.
- Combine Wet and Dry:
- Gently fold the wet ingredients into the dry, using a spatula in broad, gentle strokes to avoid over-mixing. Once no dry streaks remain, stop – overworking can make the cups tough.
- Add the Chocolate and Nuts:
- Scatter in your dark chocolate and nuts and fold briefly – I reserve a few for the tops for pretty, melty puddles.
- Fill the Cups:
- Scoop the mixture into the muffin cups, filling each about three-quarters full. If you’re feeling fancy, sprinkle a little flaky sea salt over the tops now.
- Bake:
- Bake 18–20 minutes until the centers are just set and a toothpick comes out mostly clean (don’t worry about those gooey chocolate streaks). If your kitchen is chilly, the aroma alone is enough to gather everyone around.
- Cool and Enjoy:
- Let them rest in the pan for 10 minutes before transferring to a wire rack to finish cooling. The hardest part is waiting, but the reward is a fudgy middle with just the right chew.
 Save
Save One evening, my niece helped me measure out chocolate chips and wanted to taste-test every step; by the end, we were both laughing, our faces dusted with cocoa, and the kitchen smelled like pure comfort. That batch disappeared in record time, and those giggles still echo for me every time I bake another tray.
How to Make Them Your Own
These oatmeal cups invite endless experimenting. Swapping in dried cherries or shredded coconut has transformed the basic recipe into something new at least half a dozen times in my house. Sometimes I even fold in a spoonful of peanut butter or add orange zest for a citrusy surprise.
A Word on Texture
Getting the balance right between gooey chocolate and sturdy oats is the real trick. If you prefer softer cups, take them out a minute early and let the residual heat finish the job. For a bit more chew, bake until barely set in the center but not dry around the edges.
Storing and Serving Tips
Oatmeal cups last for a few days at room temperature, but I usually freeze half the batch so there’s always a snack or dessert waiting in the wings. They’re delicious cold but reheat beautifully in a low oven if you want that just-baked feeling again.
- Wrap individually in parchment for easy grabbing on busy mornings.
- Sprinkle nuts or fruit on top right before baking for a bakery-worthy finish.
- Remember to let them cool completely before storing so they don’t get soggy.
 Save
Save There’s something unexpectedly satisfying about sharing chocolate-splattered moments over a tray of homemade treats. May these oatmeal cups bring a little extra comfort and plenty of smiles to your day.
Questions & Answers
- → How do I make these vegan?
-
Replace eggs with flax eggs (2 tbsp flaxseed meal + 5 tbsp water per 2 eggs), use dairy-free chocolate and coconut oil or a plant-based butter alternative. Bake the same time but check centers a bit earlier as texture may vary.
- → What gives them a fudgy center?
-
Using a higher proportion of wet ingredients (maple syrup, melted coconut oil) and not overbaking creates a moist, fudgy interior. Remove when a toothpick comes out mostly clean with a few melty streaks for best texture.
- → Can I swap the almond flour for another flour?
-
Yes: all-purpose flour works for a slightly denser crumb. For a nut-free option, try oat flour or a certified gluten-free blend, keeping an eye on moisture and adding a tablespoon or two more liquid if the batter seems dry.
- → How should I store and freeze them?
-
Store in an airtight container at room temperature for up to 3 days. For longer storage, freeze in a single layer on a tray then transfer to a freezer bag for up to 2 months; thaw at room temperature or warm briefly in a low oven.
- → What are good add-ins or mix-ins?
-
Dark chocolate pieces, chopped walnuts or pecans, dried tart cherries, or shredded coconut all work well. Toasting nuts first intensifies flavor; add delicate ingredients like dried fruit sparingly to avoid extra moisture.
- → How can I reduce sweetness or boost cocoa flavor?
-
Cut the brown sugar or maple syrup slightly to lower sweetness. Use higher-percent dark chocolate (70%+) and add an extra tablespoon of unsweetened cocoa powder for deeper chocolate notes; a pinch more sea salt enhances balance.
