 Save
Save This batch yields about 24 chewy, candy-studded cookies. Cream butter and sugars until light, add peanut butter and eggs, then fold in oats, flour, baking soda and salt. Stir through chocolate chips, colorful candies and optional pretzels. Scoop onto lined sheets and bake 10–12 minutes until edges are golden. Cool briefly on the sheet for a chewier texture.
The first time I made these Patriotic Monster Cookies, it was the kind of humid July day where you seek every excuse to stay inside. The sound of an old playlist filled the kitchen while I eyed the red, white, and blue candies, resisting the urge to eat them before they made it into the dough. There’s a rush of satisfaction in sneaking a warm, gooey cookie off the tray while the edges still glow golden. These aren’t just cookies—they’re a reason to linger by the oven just a little longer.
Last summer, I made a double batch for a neighborhood picnic, and by the end of the afternoon only a few stray crumbs remained on the plate. A kid with blue-stained fingers confided that he’d picked out every color to build the “perfect bite.” Watching all ages gather round for just one more cookie convinced me this recipe was destined for more than just holiday weekends.
Ingredients
- Unsalted butter: Letting it soften first creates that plush dough texture—if it’s too cold, the sugar won’t blend in smoothly.
- Granulated sugar & light brown sugar: I’ve found balancing both sugars keeps the cookies chewy yet crisp at the edges, but if you swap the ratios, your texture just won’t be quite right.
- Creamy peanut butter: Go for the classic, smooth kind, not the natural one—tried substituting once and the cookies didn’t hold their shape.
- Eggs: Room temperature eggs blend more easily and make for tender cookies, so I crack them into a bowl as I preheat the oven.
- Vanilla extract: Just a touch makes everything taste homemade (my cousin swears by adding an extra splash during holidays).
- Old-fashioned oats: These are heartier than quick oats and give the cookie that signature chew.
- All-purpose flour: Even a little too much flour and the cookies come out dense, so measure with care.
- Baking soda & salt: The salt sharpens the sweet, while the baking soda makes the cookies rise and spread.
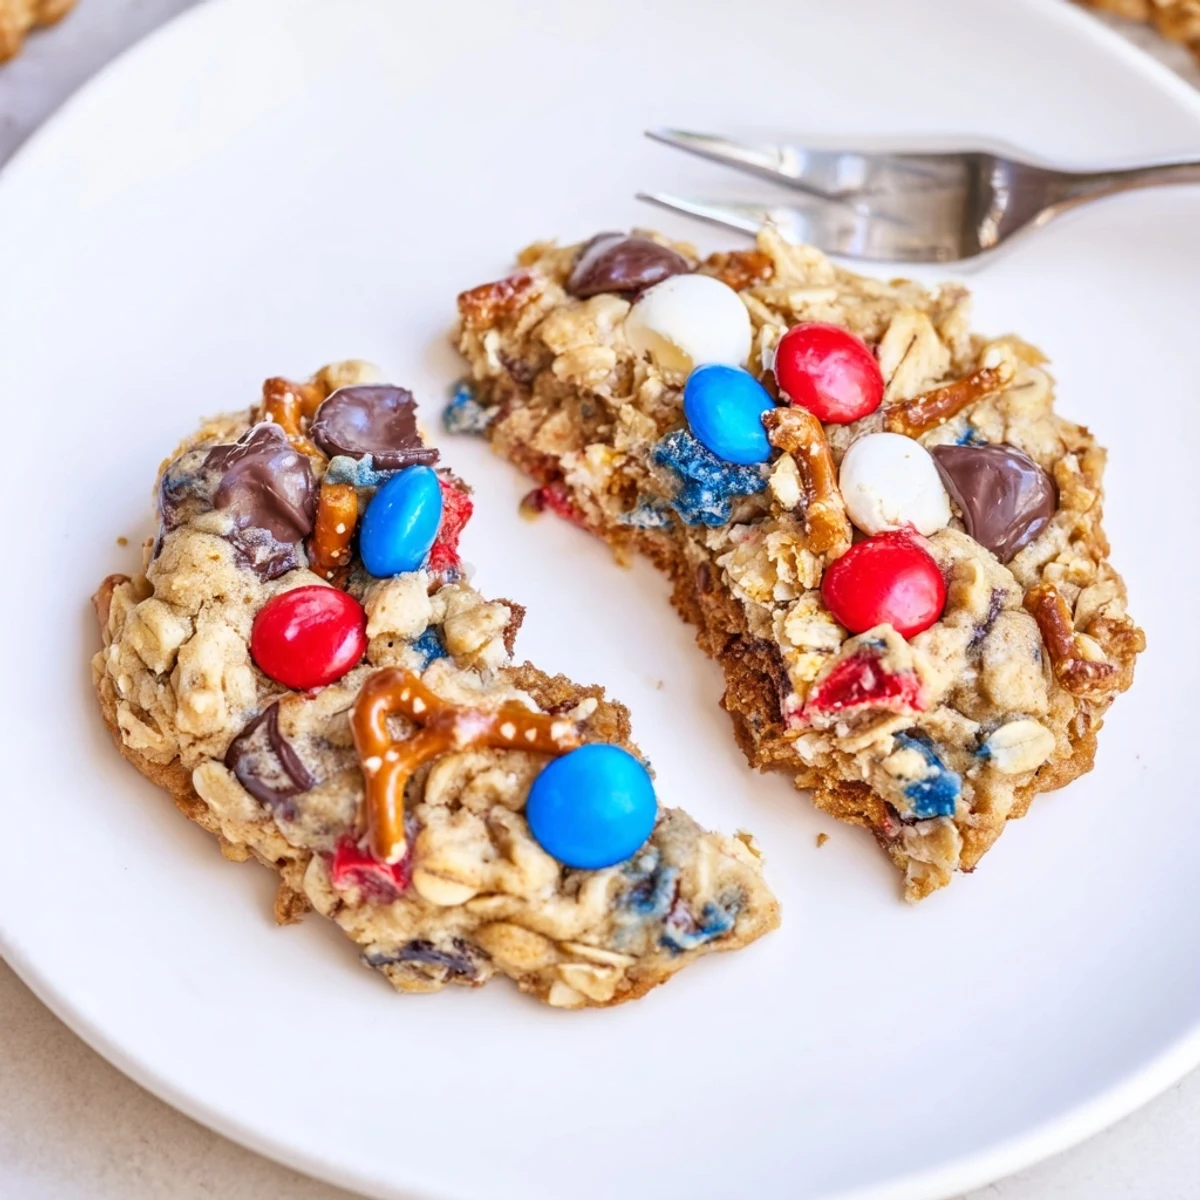
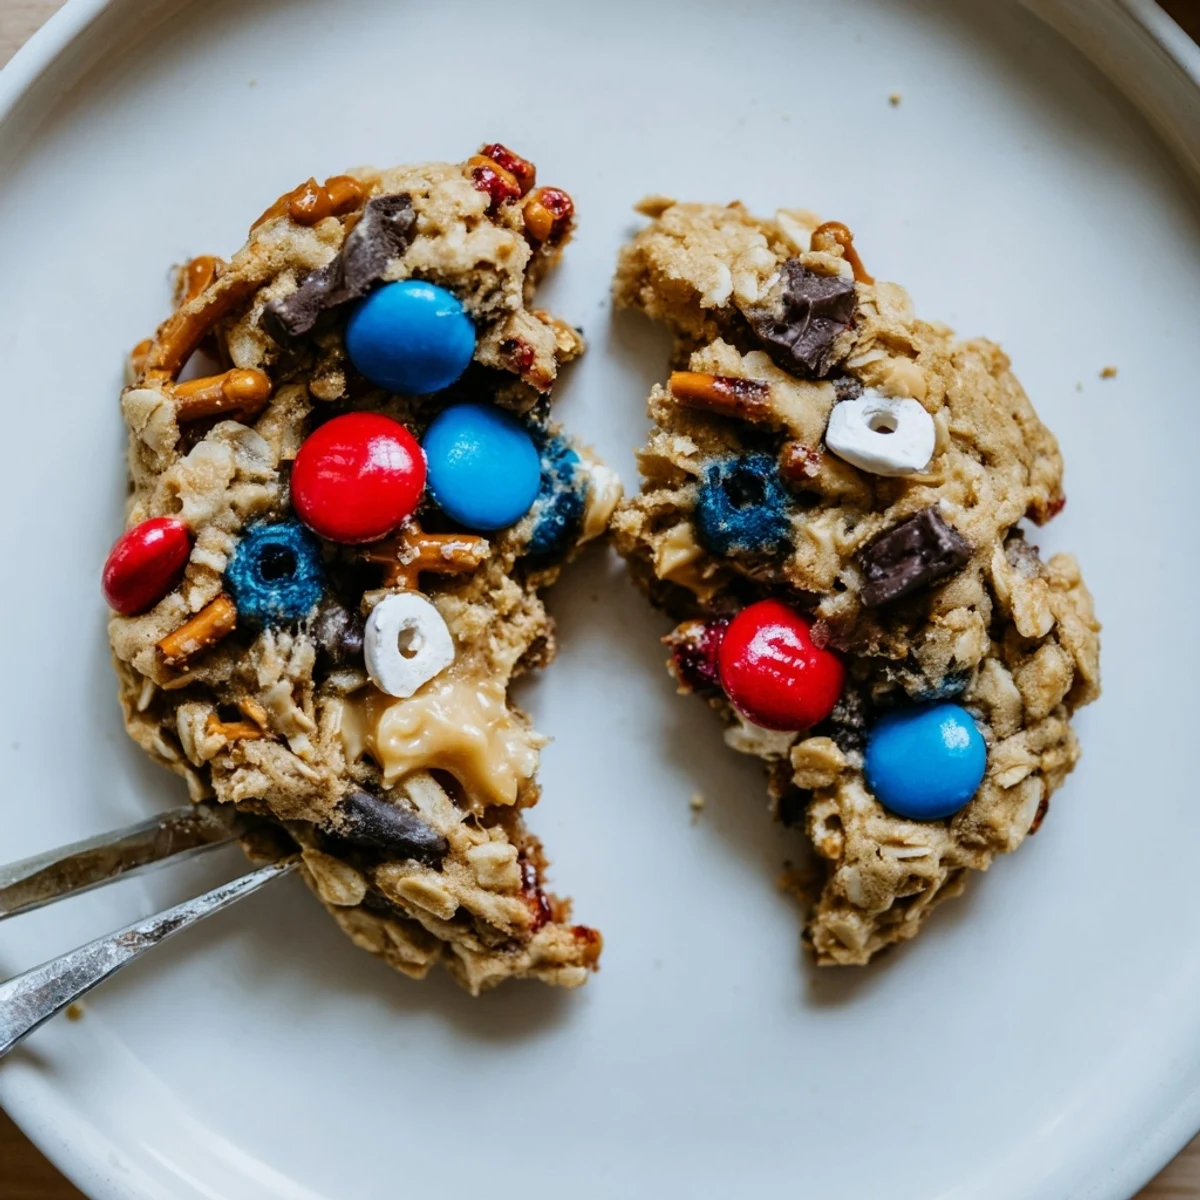
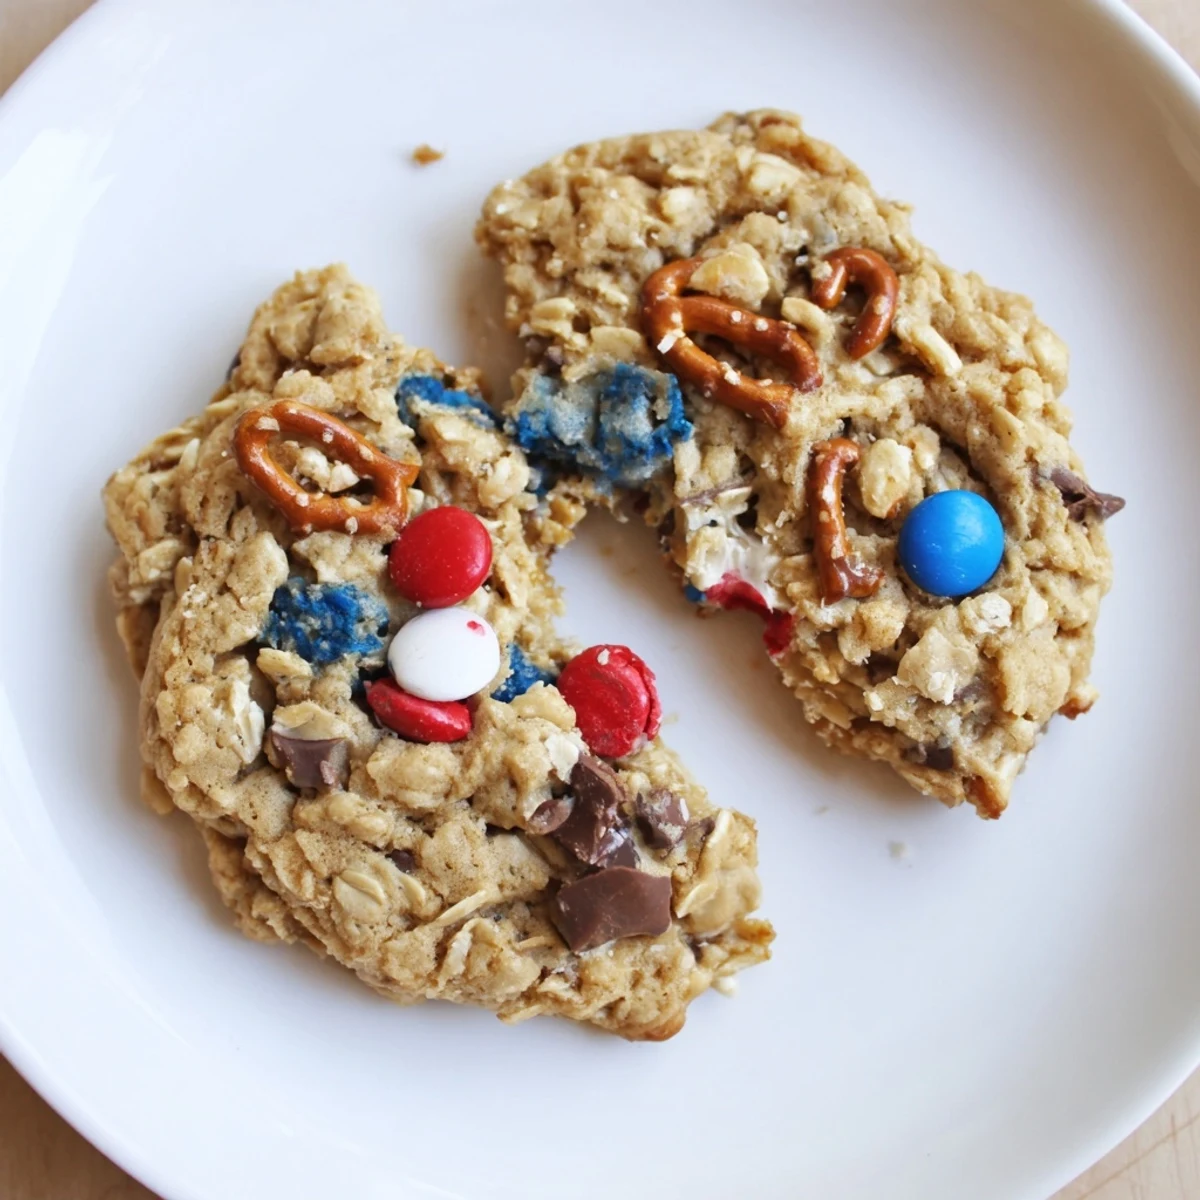
- Red, white, and blue chocolate candies: Don’t mix these in too roughly or the colors will smear—the trick is a gentle fold at the end.
- Semisweet chocolate chips: Their slightly bitter edge is perfect against the sweetness of the dough.
- Mini pretzels (optional): The extra crunch and hint of salt is unexpectedly addictive—add if you love a surprise texture in cookies.
Instructions
- Get set up:
- Preheat the oven to 350F 175C and line two baking sheets with parchment so nothing sticks. As the oven hums to life, ready your mixing bowls and listen for that satisfying crinkle as you pull out the paper.
- Cream it all together:
- In a large bowl, beat the softened butter with both sugars until it looks pillowy and pale—the mixer’s whirring means you’re nearly halfway to cookies.
- Add the wet crew:
- Scoop in the peanut butter, stirring until silky, then beat in eggs one at a time until the batter’s glossy and cohesive. Drizzle in vanilla and inhale; it’s one of the best smells you’ll ever catch in the kitchen.
- Mix the dry goods:
- Whisk together oats, flour, baking soda, and salt in a separate bowl; I always pause to run my fingers through the oats to catch stray clumps.
- Combine it all:
- Add the dry mix to the wet bowl gradually—stop as soon as the last streak of flour disappears or you’ll lose that irresistible chew.
- Fold in the fun:
- Gently stir in the chocolate candies, chips, and pretzels if using; every scoop should look like a sprinkle-studded mosaic.
- Shape and space:
- Scoop out rounded tablespoons onto the sheets, leaving room for them to spread (two inches does the trick). If any candies pop out, just press them back in on top for extra color.
- Bake to perfection:
- Slide trays in for 10–12 minutes; watch for crisp edges and slightly soft centers—the kitchen will smell impossibly inviting.
- Cool just enough:
- Let the cookies cool on the baking sheets for five minutes, then transfer to a rack to finish setting up, resisting urge after urge to sneak a hot bite.
 Save
Save It wasn’t until my brother asked for these instead of a birthday cake one year that I realized you don’t need fireworks for a moment to feel special. That batch was gone before the candles even went out, and ever since, the tradition has stuck around.
Let’s Talk About Cookie Texture
The smell when you lift a cookie off the warm tray gives away how soft they are inside. Letting them cool on the sheet for a few minutes after baking is my secret for those plush centers—skip this and you’ll lose that chewy goodness.
Making Them Your Own
One afternoon I tossed in chopped pecans and swapped half the chocolate chips for butterscotch just for fun, and nobody guessed it was an experiment. This dough is always forgiving, so feel free to tweak what you stir in as long as you keep the ratios similar.
Baking Day Troubleshooting
Sometimes your dough might seem too sticky or too dry depending on the humidity—on drizzly days, I chill the dough for ten minutes before scooping and all is well. These cookies have saved me on potluck days when time is tight and flavor can’t be compromised.
- If your cookies are overspreading, pop the dough in the fridge for a few minutes.
- Add extra candies on top just before baking for a photogenic finish.
- Be sure to taste test at least one while still warm—that’s non-negotiable.
 Save
Save There’s no better excuse for gathering around the kitchen than these cookies, especially when the colors pop and the chocolate still melts. Share with a crowd or hoard a few for yourself—the smiles will follow either way.
Questions & Answers
- → How do I keep these cookies chewy?
-
Slightly underbake and let the cookies cool on the baking sheet for about 5 minutes before transferring to a rack. Using a higher ratio of brown sugar and not overmixing the dough also helps retain chewiness.
- → Can I swap peanut butter for another nut butter?
-
Yes—almond or cashew butter work well as a 1:1 swap. Keep in mind flavor and oil content vary; if the dough seems too soft, chill it briefly before scooping.
- → How can I prevent the red and blue candies from bleeding?
-
Choose quality, heat-stable candy pieces (like M&M’s). To avoid color bleed, gently press a few candies into the tops of cookies right after baking rather than mixing them all into the dough.
- → What’s the best way to store or freeze them?
-
Store cooled cookies in an airtight container at room temperature for up to 4 days. Freeze baked cookies in a single layer, then transfer to a sealed bag for up to 3 months. Dough scoops can also be frozen and baked from frozen with an extra minute or two.
- → How do I make a gluten-free version?
-
Use certified gluten-free old-fashioned oats and swap the all-purpose flour for a 1:1 gluten-free flour blend. You may need to adjust resting time or slightly reduce wet ingredients depending on the blend.
- → Can I add nuts or change the chocolate variety?
-
Absolutely—fold in chopped nuts, white chocolate chips, or toffee for variation. Reduce one add-in proportionally if you’re increasing another to keep the cookie balance intact.
