 Save
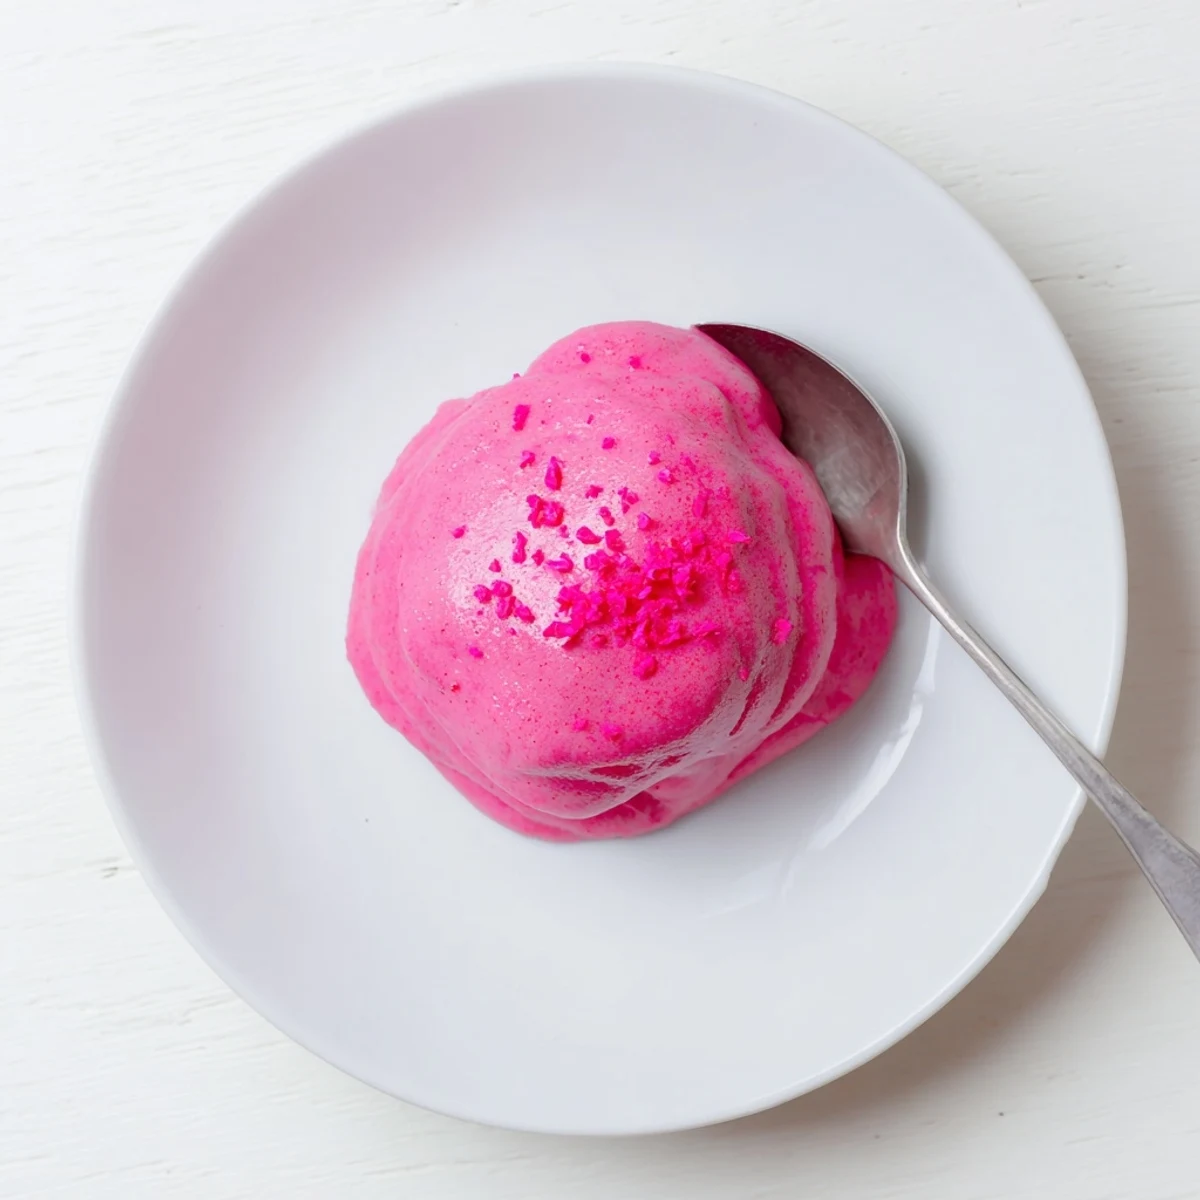
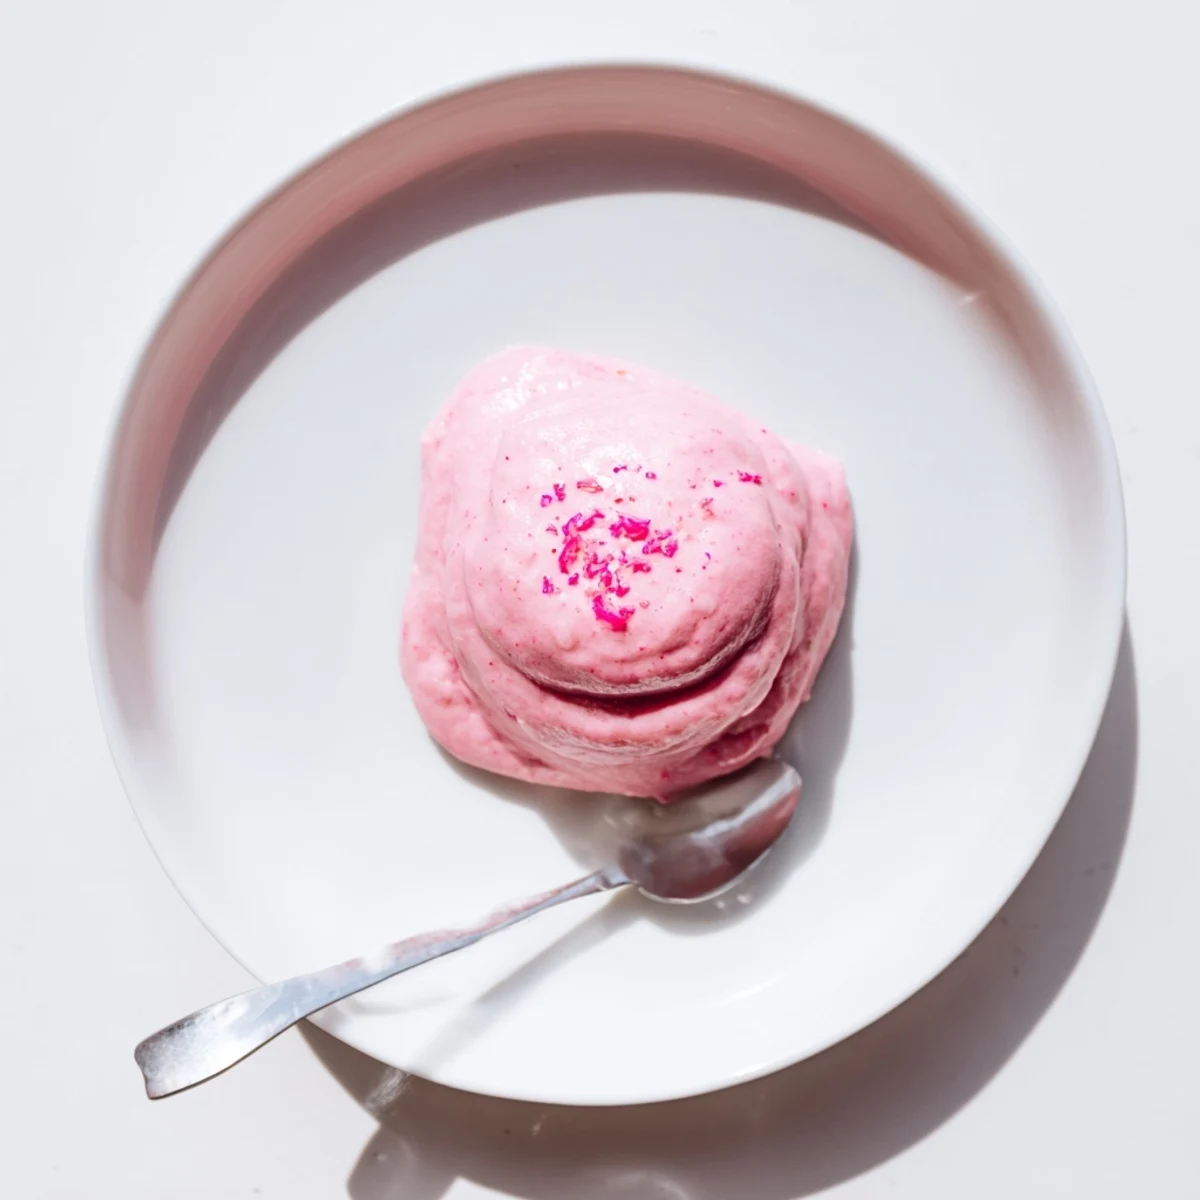
Save This vibrant pink lemon curd combines fresh pink lemon juice and zest with eggs, sugar, and butter to create a silky, tangy spread. The natural blush from pink lemons gives it a stunning rosy color, while optional raspberry juice can deepen the pink hue.
Perfect for spreading on scones, filling tart shells, or layering between cakes. The double boiler method ensures smooth, lump-free results every time. Refrigerate for at least two hours to achieve the ideal spreading consistency.
The first time I encountered pink lemons at the farmers market, I stood there completely baffled. Are they dyed? I asked the vendor, who laughed and explained they're a variegated variety with a naturally rosy hue and almost floral undertones. That afternoon I made curd, and the color was so impossibly pretty I immediately texted photos to everyone I knew who might appreciate kitchen magic.
Last spring I made a batch for my niece's birthday, folding it into whipped cream for layer cake filling. She kept sneaking back to the kitchen with a spoon, claiming she was just quality control. The leftover jars I gave to neighbors sparked a group chat discussion about what else we could spread this on, and honestly, the suggestions were surprisingly creative.
Ingredients
- Fresh pink lemon juice: Pink lemons have this subtle, almost floral sweetness that balances their acid, but regular lemons work in a pinch if you adjust the color.
- Pink lemon zest: The oils in the zest carry so much of the aromatic compounds that make this curd special.
- Granulated sugar: Don't reduce the sugar, it's not just about sweetness, it helps create that luscious, spreadable texture.
- Eggs and egg yolks: The extra yolks are what give curd its velvety, custard like consistency.
- Unsalted butter: Room temperature pieces incorporate more evenly and create that silky finish that makes homemade curd so luxurious.
- Raspberry juice or natural food coloring: Pink lemons can be pale, especially depending on the season, so a little enhancement makes the color pop.
Instructions
- Whisk your base:
- In a medium heatproof bowl, combine the eggs, egg yolks, sugar, pink lemon juice, and zest, whisking until completely smooth and no sugar crystals remain visible.
- Set up your double boiler:
- Place the bowl over a saucepan of simmering water, making sure the bottom of the bowl doesn't actually touch the water, which prevents the eggs from scrambling.
- Cook with patience:
- Whisk constantly for 8 to 10 minutes until the mixture thickens enough to coat the back of a spoon, reaching about 170°F if you're using a thermometer.
- Emulsify the butter:
- Remove from heat and whisk in the butter one piece at a time, letting each piece fully melt before adding the next, creating that impossibly smooth texture.
- Enhance the pink:
- Stir in raspberry juice or a couple drops of natural pink food coloring if you want that deeper, more vibrant rose color.
- Strain for silkiness:
- Pour the curd through a fine-mesh sieve into a clean bowl to catch any bits of cooked egg and zest, ensuring completely smooth results.
- Chill to set:
- Let cool completely, then transfer to sterilized jars and refrigerate for at least 2 hours, though the texture and flavor improve overnight.
 Save
Save My friend Sarah texted me at 11pm one night after discovering a forgotten jar in the back of her fridge, admitting she ate half of it standing up with a spoon. I wasn't even mad, that's exactly the kind of midnight decision I fully support.
Making It Your Own
Sometimes I'll add a drop of vanilla extract or a pinch of cardamom if I'm feeling fancy, and once I stirred in some crème fraîche at the end for a slightly tangier, more grown up version. The possibilities are endless once you have the basic technique down.
Serving Ideas
Beyond the obvious scone situation, this curd is incredible swirled into cheesecake batter before baking, or folded into meringue for an ethereal dessert. My personal favorite might be dolloping it onto vanilla ice cream and letting it freeze into these tart little ribbons.
Storage And Gift Giving
Properly sterilized jars keep this curd fresh for up to two weeks in the refrigerator, though it rarely lasts that long in my house. I've started making double batches just to have jars on hand for last minute hostess gifts.
- Write the date on the lid so you can track freshness.
- Include a small serving suggestion tag if gifting.
- Seal jars while the curd is still warm to create a vacuum.
 Save
Save There's something deeply satisfying about spooning homemade curd into a clear glass jar, seeing that perfect rose color catching the light. It's the kind of kitchen project that reminds me why I fell in love with cooking in the first place.
Questions & Answers
- → What makes pink lemons different from regular lemons?
-
Pink lemons have a milder, more floral flavor profile compared to regular lemons. Their distinctive blush comes from natural pigments in the rind and flesh. If unavailable, regular lemons work perfectly with a touch of natural coloring added.
- → How long does homemade lemon curd last?
-
Properly stored in sterilized jars, this curd keeps up to two weeks refrigerated. Ensure jars are clean and sealed tightly. For longer storage, freeze portions for up to three months and thaw overnight in the refrigerator.
- → Why use a double boiler method?
-
The double boiler provides gentle, indirect heat that prevents eggs from scrambling while still thickening the mixture. Constant whisking ensures smooth results and even cooking, creating that signature silky texture.
- → Can I freeze lemon curd?
-
Yes, freeze in airtight containers for up to three months. Leave some headspace as liquids expand when frozen. Thaw in the refrigerator overnight and give it a good whisk before using to restore smoothness.
- → What's the purpose of straining the curd?
-
Straining removes bits of cooked egg and lemon zest, ensuring an ultra-smooth, professional texture. This step is essential for achieving that luxurious, velvety mouthfeel that makes homemade curd special.
- → How do I know when the curd is thick enough?
-
The curd is ready when it coats the back of a spoon and your finger leaves a clear path when drawn through it. This typically occurs around 170°F (77°C) after 8–10 minutes of constant whisking.
