 Save
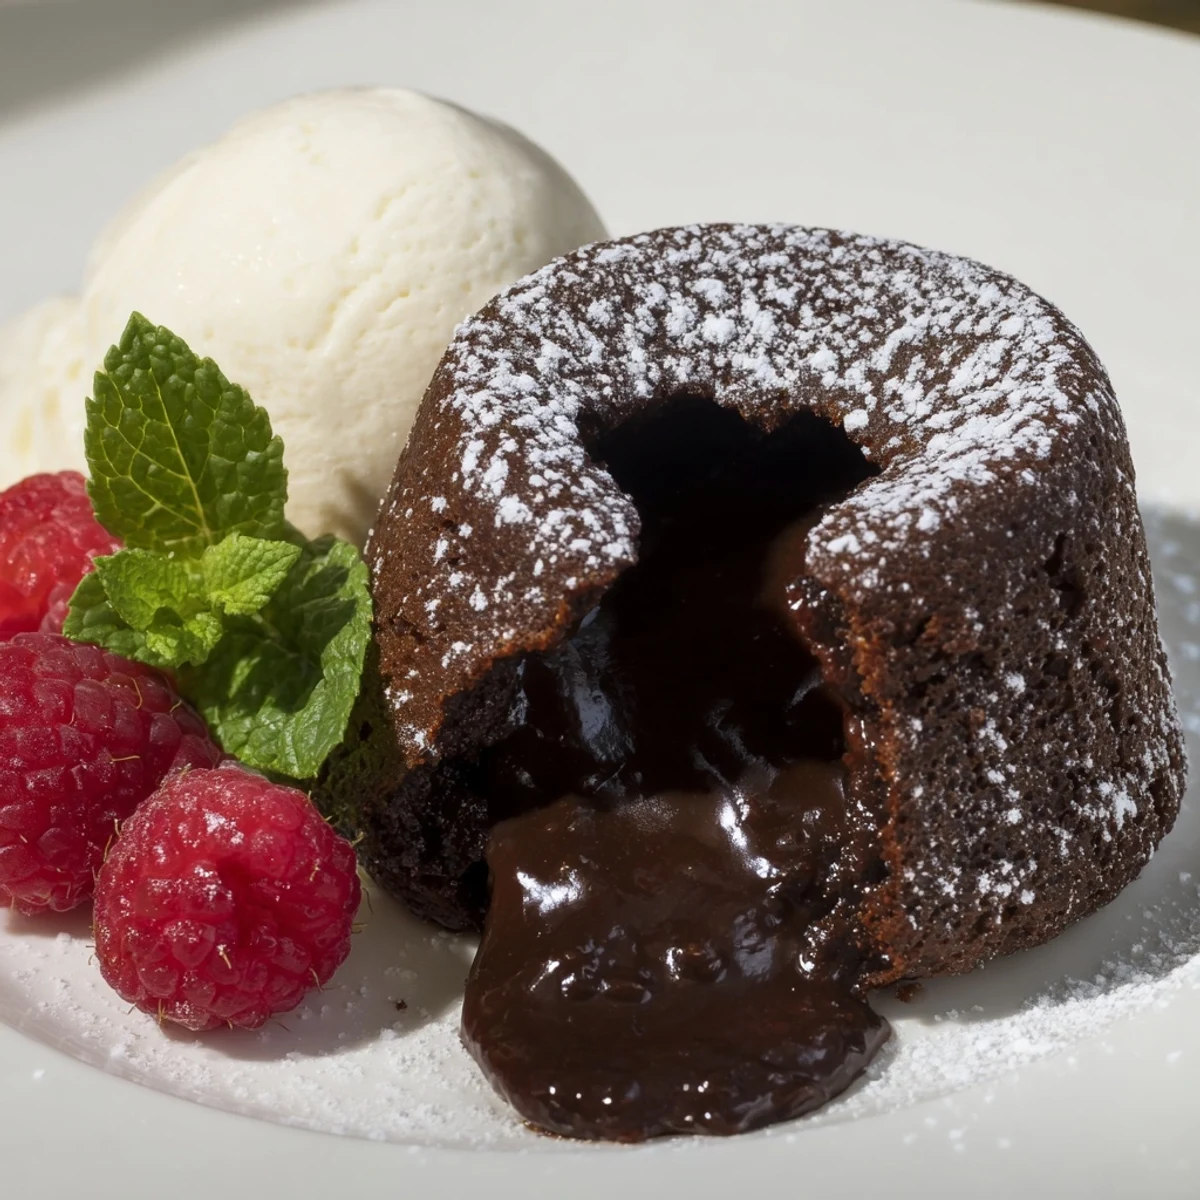
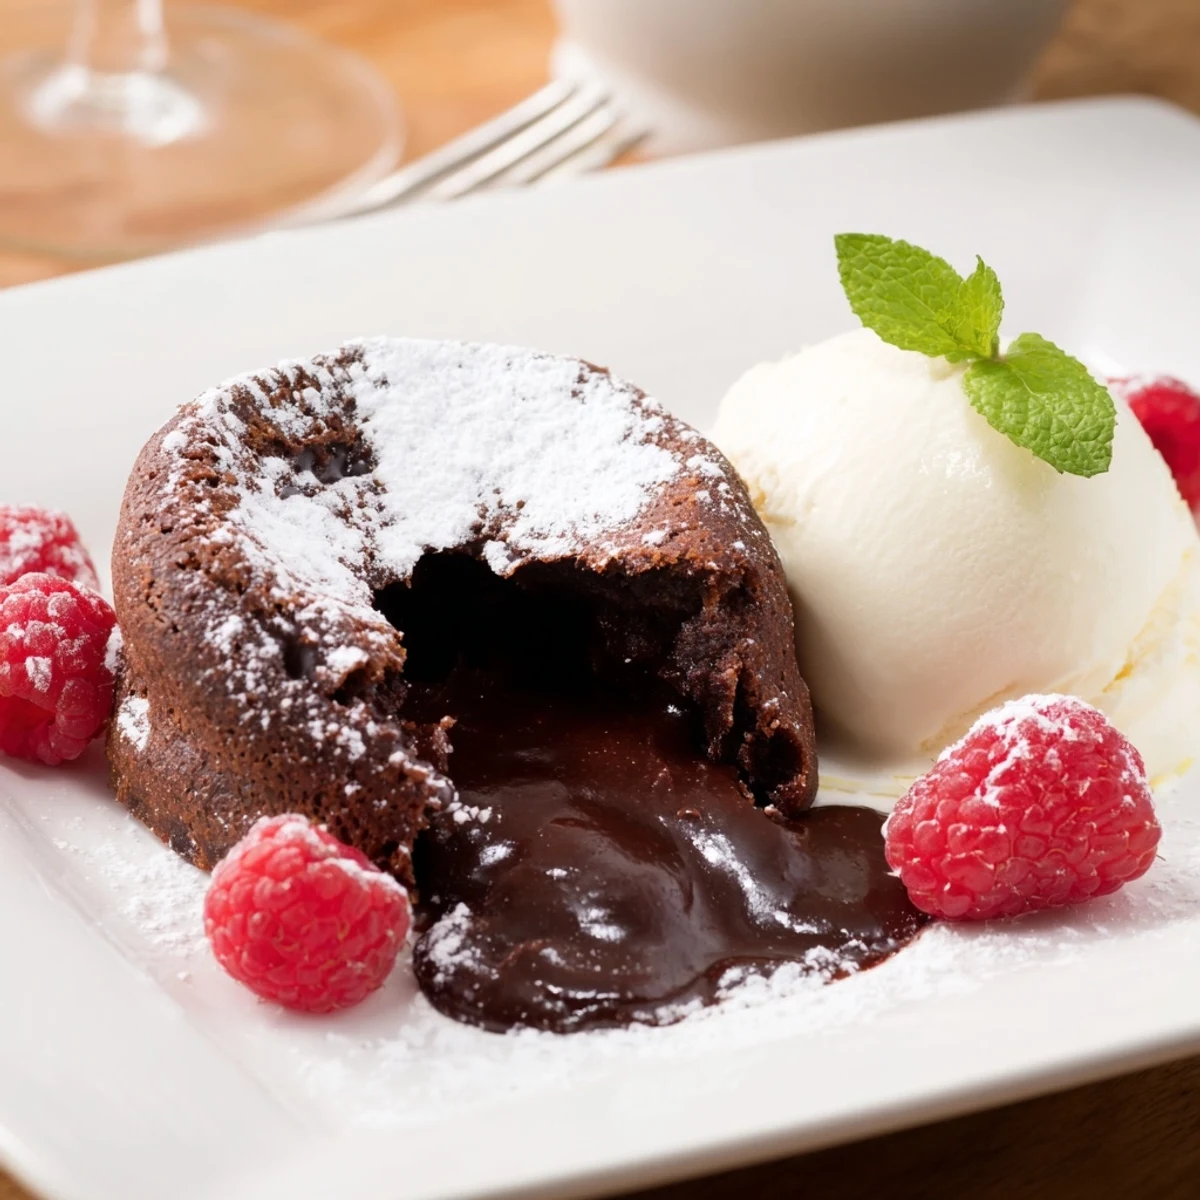
Save These individual molten chocolate cakes deliver a rich, bittersweet center that flows luxuriously when cut open. Paired with smooth vanilla bean ice cream, they offer a harmonious balance of warm and cold sensations. The batter combines melted chocolate with eggs, sugar, and a hint of vanilla, baked until edges are set but centers remain delightfully soft. Garnish with fresh berries or mint to brighten the experience. Perfect for a special dessert that impresses with texture and flavor.
My sister called me in a panic three hours before her dinner party, asking if I could bring dessert. I'd made chocolate lava cakes exactly once before, years ago, and they'd split open like overripe fruit. This time, something clicked—maybe it was the confidence of knowing what could go wrong, or maybe it was the way the chocolate smelled as it melted. Whatever it was, I pulled those cakes from the oven and watched the centers jiggle just right, and suddenly I understood why people talk about them like they're magic.
My nephew was going through a phase where he claimed to hate chocolate, which I found deeply offensive. I made these anyway, mostly to prove a point, and he ate two. He still won't admit they changed his mind, but now every time he visits he asks if I'm making the lava cakes. Food has a way of settling arguments you didn't know you were having.
Ingredients
- Bittersweet or semisweet chocolate: 115 g (4 oz), chopped—the backbone of this whole thing, so don't skimp or grab the waxy stuff from the gas station. Good chocolate folds in smoothly and tastes like chocolate should.
- Unsalted butter: 115 g (1/2 cup), plus extra for greasing—melts into the chocolate like it was always meant to be together.
- Eggs: 2 large, plus 2 large egg yolks—the extra yolks are what gives you that molten center without making the cake taste eggy, a detail I learned the hard way.
- Powdered sugar: 80 g (2/3 cup)—whisk this with the eggs until the mixture goes pale and thick, which takes about 2 minutes and signals that you're ready for the chocolate.
- All-purpose flour: 30 g (1/4 cup)—sift it so there are no lumps hiding in the batter.
- Fine sea salt: 1/4 tsp—makes the chocolate taste deeper and more itself.
- Pure vanilla extract: 1/2 tsp—adds a whisper of flavor that no one will name but everyone will taste.
- Vanilla bean ice cream: 4 scoops for serving—the cold complement that makes the warm center sing.
- Cocoa powder or powdered sugar: optional for dusting and garnish—berries or mint leaves work too if you want to look like you tried.
Instructions
- Prep your ramekins like they matter:
- Preheat your oven to 220°C (425°F)—this high heat is crucial, so don't skip it or your centers won't stay molten. Butter four 170 ml ramekins generously, then dust each one with cocoa powder, tapping out the excess so you have just a thin layer clinging to the butter.
- Melt chocolate and butter together:
- Set a heatproof bowl over simmering water (the bowl shouldn't touch the water) and add your chopped chocolate and butter, stirring until completely smooth. If you're using the microwave, do 30-second bursts and stir between each one so you don't accidentally scorch it—once chocolate burns, it's done for.
- Whisk eggs and sugar until they transform:
- In a medium bowl, whisk together the whole eggs, egg yolks, and powdered sugar until the mixture goes pale and thick, about 2 minutes. You'll see it change texture, and that's when you know the sugar has dissolved properly.
- Fold in chocolate and vanilla:
- Stir the slightly cooled chocolate mixture and vanilla extract into your egg mixture until well combined. The batter will be glossy and smooth.
- Add flour and salt with a gentle hand:
- Sift the flour and salt directly into the batter, then fold gently with a spatula until just incorporated—this is where overmixing will toughen your cake, so stop as soon as you don't see flour streaks. Seriously, don't go crazy here.
- Divide and prepare for baking:
- Divide the batter evenly among the prepared ramekins, filling each about three-quarters full. Place them on a baking sheet so they're easy to move in and out of the oven.
- Bake until the edges are set but centers are soft:
- Bake for 11–12 minutes—the edges should look fully cooked and slightly risen, but the centers should still jiggle a little when you gently shake the ramekin. This is the hardest part because you're learning to trust the wobble.
- Release and plate:
- Let the cakes rest for just 1 minute, then run a thin knife around the edges of each one and invert onto a dessert plate. If it doesn't come out cleanly, wait 30 more seconds and try again.
- Serve immediately with ice cream:
- Top each warm cake with a scoop of vanilla bean ice cream and garnish with berries or mint if you're feeling fancy. The ice cream melts into the warm chocolate, and that's the whole point.
 Save
Save I've watched people's faces light up the moment they cut into these and the warm chocolate spills out—it never gets old. That reaction, the one where they can't hide their surprise and delight, is why I keep making them.
Timing and Prep Strategy
These cakes are actually perfect if you need to prep ahead because the raw batter will keep in the ramekins in the fridge for up to 8 hours. Just add 1–2 minutes to the baking time if you're pulling them straight from the fridge, since they'll need that extra time to heat through. I've done this for dinner parties and it takes the stress out of having to make dessert last-minute while everything else is coming together.
Chocolate Quality Matters More Than You'd Think
I used to grab whatever chocolate was on sale, and the cakes were fine but not memorable. The moment I switched to chocolate with 60–70% cocoa content, something shifted—the flavor became richer and less sweet, more sophisticated without being bitter. It's a small detail that costs a couple dollars more but changes the whole experience, and honestly, when you're already making something this indulgent, why settle?
Serving and Pairing Ideas
These cakes are dressed up enough for a fancy dinner but humble enough for a cozy night in, and they pair beautifully with hot espresso if you want to lean into the richness, or with a glass of cold milk if you want something gentler. A ruby port works too if you're feeling elegant, and fresh berries or mint on top transform them into something that looks like it came from a fancy restaurant, all while tasting like homemade love.
- Dust with cocoa powder or powdered sugar right before serving for that professional touch.
- If you want to make it feel special, warm your serving plates in the oven for 2 minutes before plating.
- The ice cream melts into the warm chocolate, so don't be shy about letting that happen—it's supposed to.
 Save
Save These cakes remind me that the best desserts are the ones that feel a little bit special, a little bit risky, and completely worth the minor effort. Make them when you want to impress, when you want to treat yourself, or when you just want to know what it feels like to pull chocolate magic out of the oven.
Questions & Answers
- → How do I achieve the molten center?
-
Bake the cakes for 11-12 minutes until edges are firm but centers still jiggle slightly. Overbaking will set the center fully.
- → Can I prepare the batter in advance?
-
Yes, you can refrigerate the raw batter and add 1-2 minutes to baking time when ready to bake.
- → Which chocolate works best?
-
Use high-quality bittersweet or semisweet chocolate with 60-70% cocoa for rich flavor and smooth texture.
- → How should I serve these cakes?
-
Invert warm cakes onto plates and serve immediately with vanilla bean ice cream. Garnish with berries or mint if desired.
- → Can I dust the cakes before baking?
-
Dust ramekins with cocoa powder to prevent sticking and enhance chocolate flavor; avoid dusting cakes before baking.
