 Save
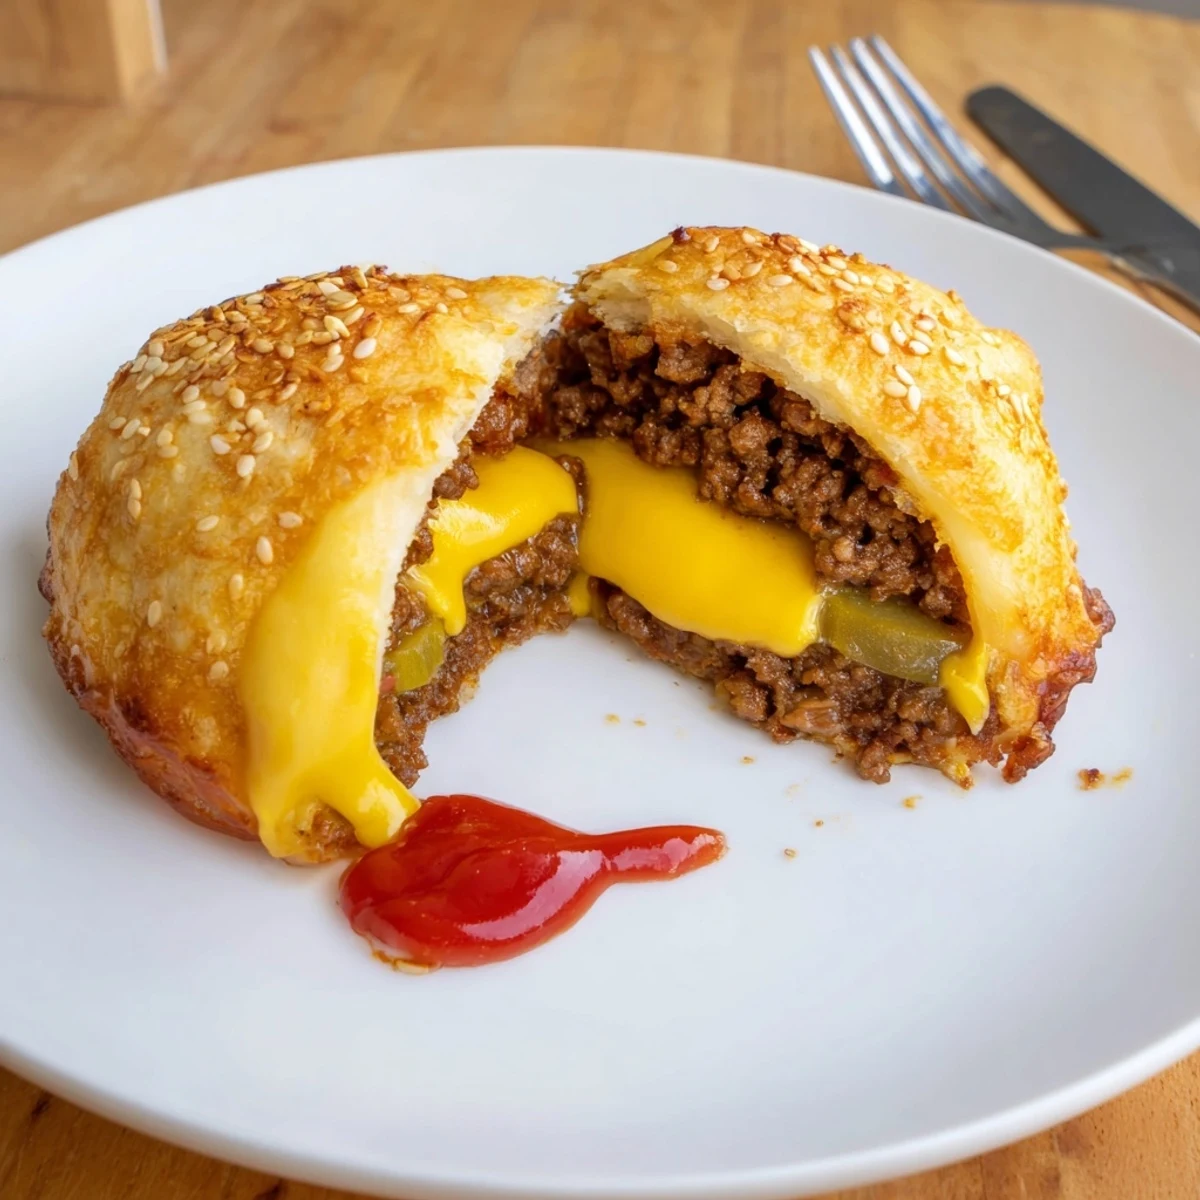
Save These golden biscuit-wrapped cheeseburger bombs are built by cooking seasoned ground beef with onion, ketchup, mustard and Worcestershire, then tucking a spoonful and a cube of mozzarella into flattened biscuit rounds with shredded cheddar. Seal tightly, brush with egg wash, sprinkle sesame seeds and bake at 200°C (400°F) until deep golden, 15–18 minutes. Let rest briefly before serving; swap pepper jack for heat or add bacon for extra smoke.
Some dishes are simply born out of a need for a little kitchen adventure, and that's exactly how these Cheesy Cheeseburger Bombs first exploded onto my table. The idea came to me during a rainy weekend, when a classic burger felt too ordinary but the craving for melty cheese and savory beef wouldn't let go. I remember wondering how far I could push those wallet-friendly tubes of biscuit dough—turns out, far enough to surprise everyone. Making these is as much about hands-on fun as the reward of pulling apart a golden bundle to find cheese stretching inside.
I still remember the batch I brought to last year’s game night, arranging each puffy bomb on a platter while my friends were too busy arguing over whose turn it was. Someone took one, a hush fell, and then every hand lunged forward. We laughed at the cheese pulls and those inevitable molten cheese mustaches that followed.
Ingredients
- Ground beef: Using lean beef keeps things juicy without being greasy; don’t be afraid to blot off extra fat after browning.
- Shredded cheddar cheese: I like to grate my own for that bold tang and gooey texture, but store-bought works in a pinch.
- Mozzarella cheese cubes: These hidden gems in each bomb melt into the center, so try freezing the cubes for 10 minutes first to slow ooze.
- Onion: Sautéing the onion first is one of those steps you shouldn’t rush; it sweetens the overall bite.
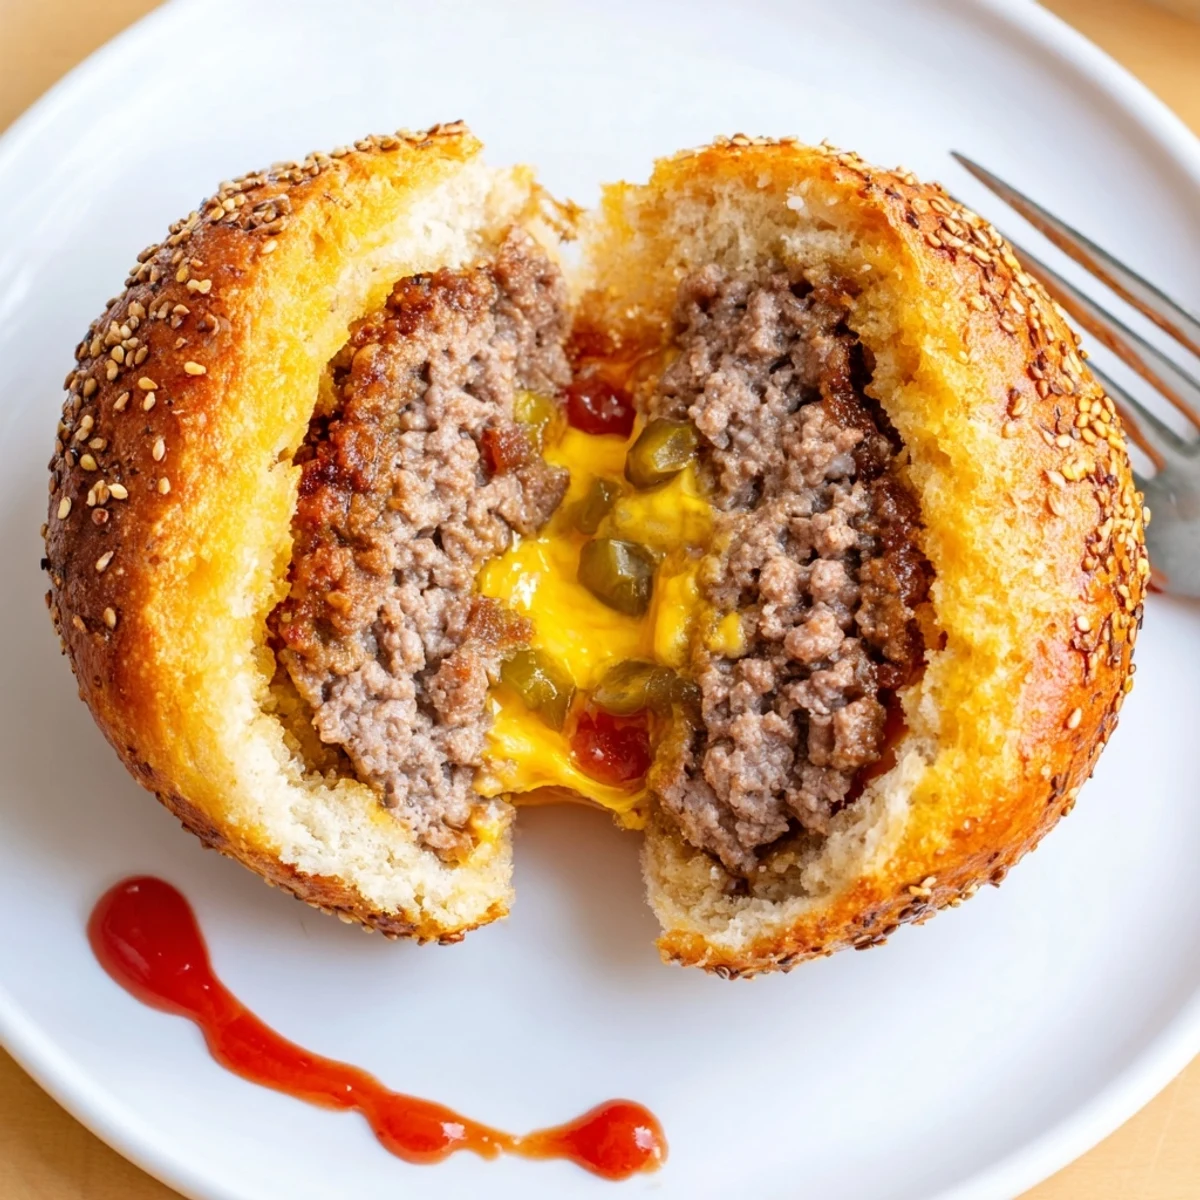
- Pickle: Chopped pickle adds sharpness—skip if you’re not a fan, but it wakes everything up.
- Refrigerated biscuit dough: These make for the speediest wrap; in a pinch, homemade dough is also lovely.
- Ketchup & mustard: The classic combo ties everything together; I always sneak in an extra drizzle of mustard.
- Worcestershire sauce: Just a splash, but what a difference in depth.
- Garlic powder, salt, black pepper: Don’t skimp—these small measures make the flavor sing.
- Egg: Brushed on top for the shiniest, golden crust.
- Sesame seeds: These finish the look and echo true burger vibes—toast them for extra flavor if you’d like.
Instructions
- Prep your station:
- Heat the oven to 200°C and line a baking sheet with parchment, so you don’t lose any of the melty cheese later.
- Build the burger filling:
- In the skillet, stir the onions until they’re soft, then add the beef, garlic, salt, and pepper; keep moving it all around so nothing burns, and pour off any excess fat.
- Sauce it up:
- Now blend in the ketchup, mustard, Worcestershire, and pickle bits; the skillet will sizzle and smell just like a burger shack, then let the mixture cool a bit.
- Shape the bombs:
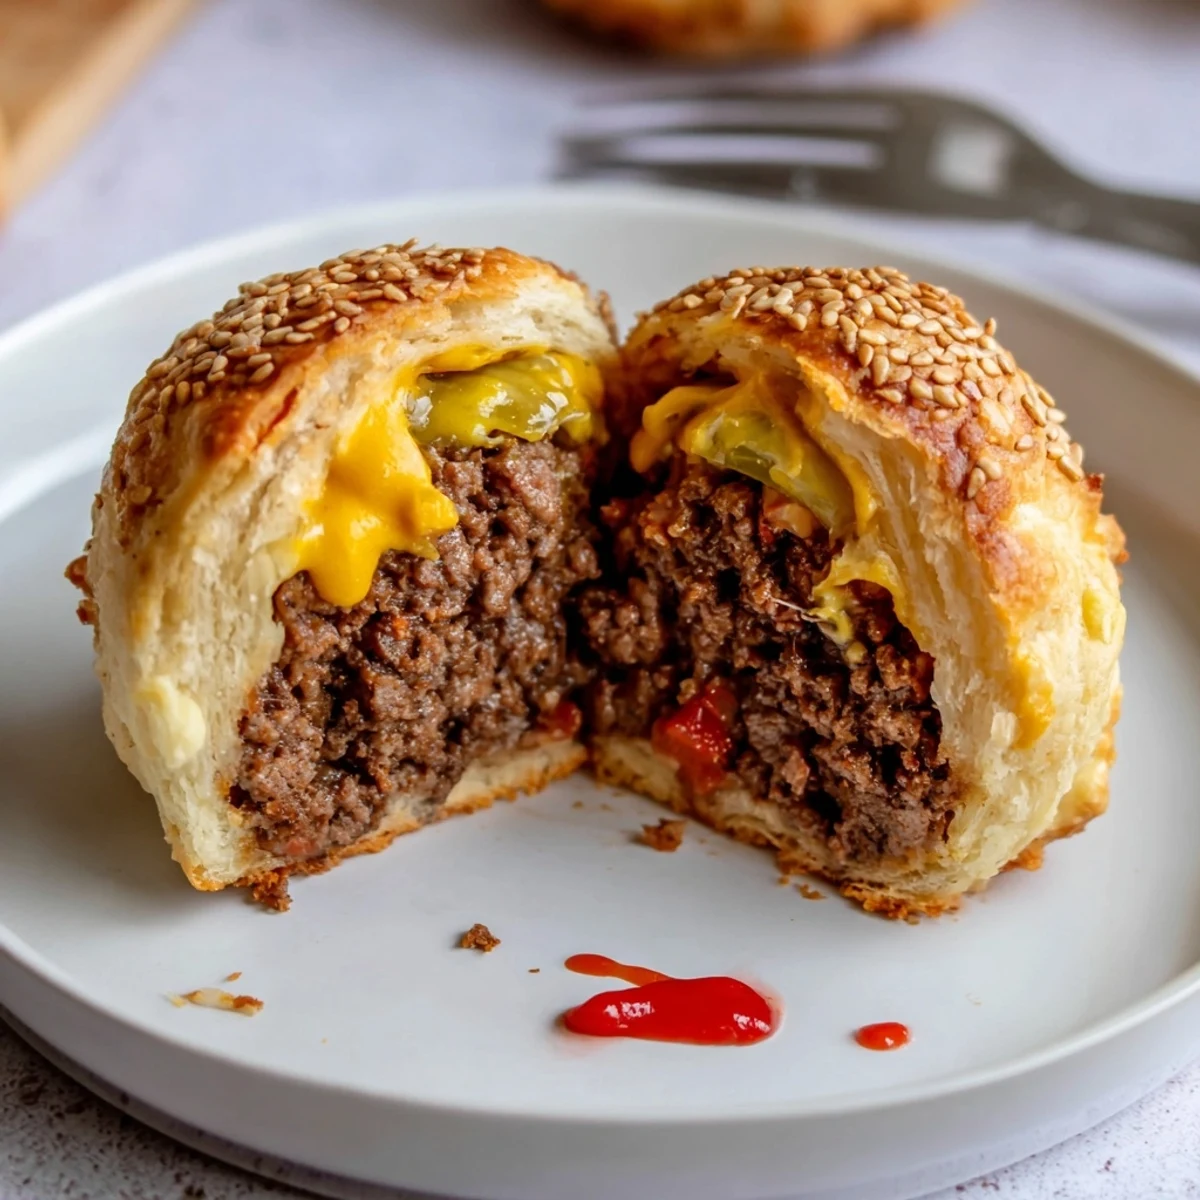
- Flatten each biscuit round out with your fingers; spoon a bit of filling, add shredded cheddar, then nestle the mozzarella cube in the center—it feels like hiding treasure.
- Seal and arrange:
- Pinch the dough closed at the top, roll seams underneath, and set the dough balls flat side down spaced apart on the tray.
- Egg wash and sprinkle:
- Brush each bomb with beaten egg (a pastry brush is best), then scatter with sesame seeds for that signature finish.
- Bake to gold:
- Slide them into the oven until they’re deeply golden—don’t be tempted to open the door too soon, about 15 to 18 minutes does it.
- Cool and devour:
- Let them rest five minutes; the cheese settles and you avoid tongue burns—trust me, I learned the hard way.
 Save
Save Sometime after making these for a neighborhood barbecue, folks started asking for ‘the explosion bites’ at every get-together. Sharing a tray of warm, golden bombs somehow turned even boring weekday dinners into a casual celebration, complete with dipping sauce wars and friendly debates over who gets the last one.
Let’s Talk About Variations
One of my favorite experiments is swapping cheddar for pepper jack cheese when I’m craving a little spice, or slipping in a thin slice of cooked bacon for smokiness. Chopped jalapeños or even tiny bits of grilled pineapple make for wild, crowd-pleasing twists. The best part is you can make each bomb a little different just by switching up the fillings or cheeses.
Getting That Golden Finish
An egg wash isn’t just for looks—it seals the dough and helps the sesame seeds stick. If you want an even richer crust, use a mix of egg and a splash of milk. I sometimes sprinkle on a pinch of coarse salt for extra crunch at the very end.
Dipping Sauces and Serving Fun
The right dip makes these shine—classic ketchup and mustard never fail, but smoky barbecue sauce or a spicy mayo totally transforms each bite. I like laying everything out on a platter with a little bowl for each sauce so everyone can mix and match their favorites. Watching friends discover their own favorite combos is a highlight of serving these.
- Set the bombs out warm for the best cheese stretch.
- Use a serrated knife if you need to cut them for sharing.
- Keep an eye on the bottoms so they don’t over-brown in the oven.
 Save
Save Whether it’s game day, a quick dinner, or just a need for something fun, these cheeseburger bombs really do steal the show. Have extra napkins ready—the cheese will always try to escape, and that’s half the fun.
Questions & Answers
- → How do I keep the filling from leaking?
-
Dry the cooked beef slightly and cool it a few minutes before filling. Use a small spoonful, pinch dough firmly at the seams, and press edges together to create a tight seal. Chilling filled balls briefly helps them hold shape during baking.
- → Which cheeses melt best inside?
-
Soft, melty cheeses like mozzarella and shredded cheddar work best together—mozzarella for gooey center and cheddar for flavor. Pepper jack adds heat, while cubed cheese gives a satisfying molten core.
- → My biscuits brown too quickly—what should I do?
-
If tops brown before centers are done, lower oven to 180°C (350°F) and lengthen bake time, or tent with foil for the last 5–8 minutes to prevent overbrowning while finishing the interior.
- → Can I make them ahead or freeze them?
-
Assemble and freeze on a baking sheet until firm, then transfer to a bag. Bake frozen, adding 6–10 minutes to the time and covering if browning too fast. Cool leftovers and refrigerate up to 3 days or freeze up to 1 month.
- → Any tips for adding extra flavor?
-
Mix cooked bacon bits into the beef, swap cheddar for pepper jack for spice, or fold finely chopped pickles into the filling for tang. A light brush of melted butter after baking boosts shine and richness.
- → How should I reheat leftovers for best texture?
-
Reheat in a 175–180°C (350°F) oven for 8–10 minutes to restore crisp exterior and melted interior. Avoid microwaving alone, which can make the dough soggy—use a quick oven finish after a brief microwave if short on time.
